You got the interview. That’s the hard part, right?
Not quite. Because the interview is on Zoom (or Teams, or Google Meet), and suddenly you’re dealing with variables that didn’t exist a decade ago. Camera angles, lighting, microphone quality, internet stability, the pile of laundry just outside the frame, and the peculiar challenge of making eye contact with a tiny dot on the top of your laptop.
Video interviews have become the default first round for most companies and the standard at every stage for remote roles. A 2023 survey by Resume Builder found that 82% of employers use video interviews during their hiring process, and nearly 60% conduct at least one round entirely over video, even for in-person positions.
The problem: most candidates prepare for the questions but ignore the medium. They rehearse their answers, research the company, and then sit down in front of a dim laptop camera with ceiling fan light casting shadows across their face, a cluttered bookshelf behind them, and audio that sounds like they’re talking from inside a tin can.
The interviewer’s brain registers all of this before you say a single word. And first impressions formed in the opening seconds of a video call are extremely difficult to override, no matter how brilliant your answers are.
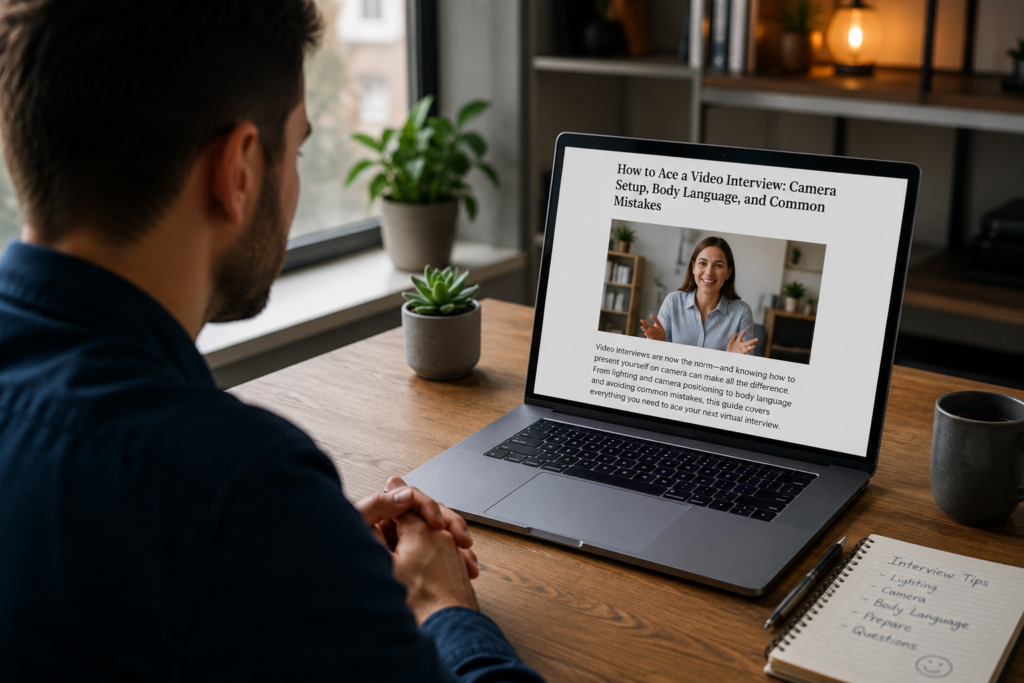
This guide covers every element of a successful video interview: the technical setup that makes you look and sound professional, the body language that communicates confidence through a screen, and the common mistakes that quietly kill otherwise strong candidacies.
Part 1: The Technical Setup
Your technical setup is the foundation of everything else. The best interview answers in the world lose their impact when delivered through a pixelated feed with echoing audio and a backlit silhouette where your face should be.
The good news: you don’t need expensive equipment to look polished. You need 20 minutes of deliberate setup and the willingness to test it before the actual call.
Camera Positioning
Where you place your camera determines how the interviewer perceives you physically, and physical perception matters more on video than most people realize.
The rule: camera at eye level or slightly above. This is the most flattering and professional angle for any face shape. It simulates the natural perspective of looking someone in the eye across a table.
What happens when you get this wrong:
- Camera too low (laptop on desk, looking down): The interviewer sees up your nostrils, your chin dominates the frame, and you appear to be looking down at them. This unconsciously communicates condescension or disengagement, neither of which you want in an interview.
- Camera too high (mounted on a tall shelf, looking up): You appear smaller, weaker, and slightly submissive. Your forehead dominates the frame. You look like you’re asking for permission to exist.
- Camera too far away: You become a small figure in a large room. Your facial expressions, one of your most powerful communication tools, become unreadable. The interviewer feels disconnected.
- Camera too close: Your face fills the entire screen. It feels claustrophobic and intense. Every micro-expression is magnified, and any camera movement is exaggerated.
The fix: Stack your laptop on a box, a few books, or a laptop stand until the camera lens aligns with your eye line. If you’re using an external webcam, mount it on top of your monitor at eye level. Sit an arm’s length (roughly 18 to 24 inches) from the camera.
The framing: Your head and shoulders should be visible, with a few inches of space above your head and the frame cutting off around mid-chest. Think of a TV news anchor. That’s the framing you’re aiming for. You should be centered, not pushed to one side of the screen.
Lighting
Lighting is the single biggest factor in video quality, more impactful than camera resolution, more noticeable than background, and more revealing of professionalism than your outfit.
The rule: face the light source. Never sit with the light behind you.
Why this matters: When light comes from behind you (a window behind your desk, a ceiling light directly overhead), the camera exposes for the bright background and turns your face into a dark silhouette. The interviewer can’t see your expressions, your eyes, or your engagement. You become a shadow with a voice. This is the most common video interview mistake, and it’s the easiest to fix.
The ideal setup:
- Natural light (best option): Face a window. The window should be in front of you, behind your monitor, so daylight illuminates your face evenly. Morning and late afternoon light is softer and more flattering than harsh midday sun. If the sun is too bright, a sheer curtain diffuses it perfectly.
- Ring light or desk lamp (second best): If you’re interviewing in a room without good natural light, position a ring light or a desk lamp behind your monitor, facing you. A 10-inch ring light ($20 to $40) with adjustable brightness is one of the best investments you can make for video calls. Place it directly behind or slightly above your screen.
- Two-source setup (most polished): If you want broadcast-quality lighting, use two light sources at roughly 45-degree angles to your face, one on each side. This eliminates shadows and creates even, dimensional lighting. This is overkill for most interviews, but if you’re interviewing for a client-facing role where on-camera presence matters, it’s worth the effort.
What to avoid:
- Overhead fluorescent lighting only (creates harsh shadows under your eyes and nose, makes you look tired)
- A single lamp to one side of your face (creates dramatic shadows on the other side, like a horror movie poster)
- RGB or colored lighting (this is a professional interview, not a Twitch stream)
- No lighting at all in a dim room (your camera’s auto-exposure will compensate by adding digital grain, making the image grainy and unflattering)
The test: Open your camera app or Photo Booth and sit in your interview position 30 minutes before the call. If you can clearly see both of your eyes, the color of your irises, and no harsh shadows across your face, your lighting is good. If one side of your face is noticeably darker or your eye sockets look hollow, adjust your light source.
Audio Quality
Most interviewers will forgive slightly imperfect video. They will not forgive bad audio. If they can’t hear you clearly, the interview is functionally over regardless of how great your answers are.
The hierarchy of audio quality (best to worst):
- Wired headset with a built-in microphone (Apple EarPods, HyperX, or any wired headset). The microphone sits close to your mouth, eliminating room echo and background noise. This is the most reliable option.
- Wireless earbuds with a microphone (AirPods, AirPods Pro, Galaxy Buds). Good quality, but battery life is a concern. Charge them fully before the interview. AirPods Pro with active noise cancellation are excellent at eliminating background noise from your side.
- External USB microphone (Blue Yeti, Samson Q2U, Elgato Wave). Studio-quality audio that makes you sound like a podcast host. Impressive but potentially overkill. If you already own one, use it.
- Built-in laptop microphone. This is the default, and it’s the worst option. Laptop mics pick up keyboard sounds, fan noise, room echo, and every ambient sound within 10 feet. They make you sound distant and hollow. Avoid if you have any alternative.
The hidden audio killer: room echo. Hard surfaces (bare walls, tile floors, glass desks) bounce sound around and create a reverberant, unprofessional quality. If your room echoes when you clap, add soft surfaces: close the curtains, put a blanket or towel on the desk out of frame, or sit in a room with carpet and soft furniture. A carpeted bedroom with a closed door often sounds better than a stylish home office with hard floors and bare walls.
Background noise: Close windows, shut doors, silence your phone, and let anyone in your household know you’re interviewing. If you have pets, put them in another room. Dog barks and cat appearances make great LinkedIn anecdotes, but during a competitive interview, they’re distracting interruptions that shift focus away from your answers.
Internet Connection
A dropped video call or persistent lag communicates, fairly or not, a lack of preparation. Interviewers assume that if you can’t manage a stable connection for a 45-minute call, you’ll have the same issues during daily standups and team meetings.
Pre-interview checklist:
- Use a wired ethernet connection if possible. A $15 ethernet adapter for your laptop eliminates Wi-Fi instability entirely. This is the single most reliable thing you can do for connection quality.
- If using Wi-Fi, sit as close to the router as possible. Every wall between you and the router degrades the signal. Same room is ideal.
- Close all other tabs, apps, and downloads. Streaming, cloud syncing, software updates, and other browser tabs all consume bandwidth. Close everything except the video call platform and any notes you need.
- Ask others on your network to limit bandwidth-heavy activity during the interview. Someone streaming 4K video in the next room can tank your connection. A 30-minute request for cooperation is reasonable.
- Have a backup plan. If your connection drops, know what you’ll do. Have the interviewer’s email address ready so you can send a quick note. Have your phone charged and your mobile data on in case you need to rejoin from your phone. Have the dial-in number saved if the platform offers audio-only calling.
Run a speed test (fast.com or speedtest.net) from your interview location one hour before the call. You need a minimum of 5 Mbps upload and 10 Mbps download for reliable HD video. If your speeds are below that, close applications, move closer to your router, or switch to a wired connection.
Background and Environment
Your background is the set design for your interview. It communicates professionalism, personality, and attention to detail without you saying a word.
Best backgrounds (in order of recommendation):
- A clean, simple wall. A plain or lightly textured wall with minimal decoration. Boring? Yes. Professional? Absolutely. It keeps all attention on you and eliminates distractions.
- A tidy bookshelf or organized home office. Books, a plant or two, and a few tasteful items suggest intellectual curiosity and a real workspace. Keep it minimal. A cluttered shelf is worse than a blank wall.
- A room with depth. A background that shows some of the room (a desk lamp, a framed print, a window with blinds) adds dimension without distraction. Anything in the background should be intentional and not competing for attention.
Backgrounds to avoid:
- An unmade bed or bedroom with personal items visible
- A kitchen with dishes in the sink or food on the counter
- A window directly behind you (backlight problem, covered above)
- Moving elements: ceiling fans, open doors where people might walk by, a television playing in the background
- Controversial or polarizing items: political signs, religious imagery (unless relevant to the role), alcohol bottles, or anything that could trigger an unconscious bias
Virtual backgrounds: use with caution. Zoom and Teams offer virtual backgrounds that replace your real environment with an image. These can work if your computer has enough processing power to render them cleanly. On older or less powerful machines, virtual backgrounds create ghosting effects where parts of your body disappear, your hands go transparent, or your outline flickers. This is distracting and looks worse than almost any real background.
If you use a virtual background, test it extensively with movement. Raise your hands, lean forward, gesture. If the edges stay clean, it’s fine. If you see glitching or transparent patches, switch to your real background and clean up the room instead.
A green screen ($20 to $50) behind your chair makes virtual backgrounds render perfectly on any computer, but this is deep in “extra credit” territory.
Part 2: Body Language on Camera
Body language accounts for a significant portion of how your message is received in any conversation. On video, the rules shift because the camera captures a narrower range of movement, and certain in-person signals don’t translate through a screen.
Eye Contact (The Camera, Not the Screen)
This is the most counterintuitive part of video communication. To make eye contact with the interviewer, you need to look at the camera lens, not at the person’s face on your screen.
When you look at their face on your screen, your gaze appears to be cast slightly downward from the interviewer’s perspective. It’s subtle but noticeable, especially over a long conversation. You seem to be looking past them rather than at them.
Practical tips for camera eye contact:
- Position the video call window as close to the camera as possible. Drag the Zoom or Teams window to the top of your screen, directly below the camera. This minimizes the gap between where your eyes want to look (their face) and where they should look (the lens). The difference becomes almost imperceptible.
- Look at the camera during your key points. You don’t need to stare at the lens for the entire interview. When listening, it’s natural to look at their face on screen. But when you’re making an important statement, delivering a prepared answer, or closing a thought, shift your gaze to the camera. These are the moments where direct eye contact has the most impact.
- Put a small sticky note or dot near the camera lens. A tiny visual cue near the lens reminds you where to look. Some people place a small photo of a friendly face next to the camera to make the lens feel more human.
- Reduce the size of the interviewer’s video. If their face is large on your screen, your eyes will be pulled to it constantly. Making the video window smaller (while keeping it near the camera) reduces the visual pull.
Posture
How you sit communicates energy, interest, and confidence before you open your mouth.
The ideal video interview posture:
- Sit up straight but not rigidly. Think “alert and engaged,” not “military attention.” A slight forward lean (5 to 10 degrees from vertical) signals interest. Leaning back signals passivity or disengagement.
- Keep both feet flat on the floor. This grounds your body and prevents fidgeting, rocking, or chair spinning that the camera picks up even when your legs aren’t visible.
- Rest your forearms on the desk or table in front of you, just below the frame. This creates a stable anchor point and prevents the common “floating arms” problem where people don’t know what to do with their hands.
- Keep your shoulders relaxed and slightly back. Hunched shoulders read as nervousness or low energy. If you catch yourself hunching, take one deep breath and let your shoulders drop.
What to avoid:
- Slouching back in your chair (reads as “I don’t care about this conversation”)
- Swiveling in a desk chair (your body rotates in and out of frame, which is visually disorienting)
- Crossing your arms (defensive body language, amplified on camera because the frame is tight)
- Leaning on one hand with your head tilted (reads as boredom, even if you’re concentrating)
Facial Expressions
On a video call, your face is doing about 80% of the nonverbal communication work because it occupies most of the frame. Expressions that are subtle in person become magnified on camera.
Smile when it’s natural. You don’t need to grin continuously, that would look unhinged. But a genuine smile when greeting the interviewer, when discussing something you’re passionate about, or when the conversation reaches a lighter moment creates warmth and likability. People who never smile during video interviews come across as flat, disengaged, or uncomfortable.
Nod to show active listening. In person, you signal engagement through a whole range of body movements. On camera, nodding is the most visible and effective equivalent. When the interviewer is speaking, occasional nods (not constant bobbling) communicate “I hear you, I understand, keep going.” This is especially effective during video interviews because it provides visual feedback that replaces the verbal “mm-hmm” and “right” that can create audio interruptions.
Raise your energy by 15%. Video calls flatten energy. A person who seems perfectly engaged in person can appear low-energy and bored on camera. Consciously raise your expressiveness by about 15% above your natural baseline. Smile a bit wider, nod a bit more deliberately, let your eyebrows move when you’re making a point. This isn’t acting. It’s compensating for a medium that dampens nonverbal signals.
Control nervous micro-expressions. Lip biting, forehead touching, eye darting, and repeated blinking all become noticeable on camera. If you have a nervous habit, identify it during practice calls with a friend and consciously redirect the energy. Planting your hands on the desk and taking a slow breath often replaces nervous fidgeting without requiring willpower.
Hand Gestures
Gestures add emphasis, warmth, and visual interest to your communication. On camera, they need to be calibrated.
Keep gestures within the frame. If your hands shoot above or below the visible area, they appear as flashes of movement at the edge of the screen, which is distracting rather than helpful. Keep your gestures in the space between your chest and your chin, within the visible frame.
Use open palms. Open-palm gestures (palms facing the camera or ceiling) communicate openness, honesty, and confidence. Pointed fingers, closed fists, or chopping motions read as aggressive on camera.
Slow down your gestures. Video compression and frame rates can make fast hand movements look jerky or blurry. Deliberate, slightly slowed gestures translate more cleanly through the camera.
Don’t hold things. Pens, stress balls, or fidget items in your hands will distract both you and the interviewer. Keep your hands empty and visible.
Part 3: Before the Call
Test Everything the Day Before
Do not wait until 10 minutes before the interview to discover that your microphone isn’t working, your camera defaults to an unflattering angle, or the video platform requires a software update.
The day before your interview:
- Open the video platform (Zoom, Teams, Google Meet, Webex) and run a test call. Most platforms have a “test audio and video” feature. Use it.
- Record a 60-second video of yourself answering a practice question. Play it back. Check lighting, framing, audio quality, and background. This 60 seconds will reveal problems you’d never notice in a mirror.
- Test your internet speed from your interview location.
- Verify your backup plan (phone hotspot, dial-in number, interviewer’s email).
- Charge all devices: laptop, phone, wireless earbuds.
30 minutes before the interview:
- Close all unnecessary applications and browser tabs.
- Restart your computer (this clears memory and reduces the chance of freezing or lag).
- Open the video platform and check that camera, mic, and speakers are set to the correct devices.
- Send a “test message” in the chat to verify it’s working.
- Silence your phone and place it face down, out of reach.
- Put a glass of water within reach but out of the frame.
- Use the bathroom (obvious, but stress makes people forget).
Dress Appropriately (All the Way)
The standard advice is to dress from the waist up, since the camera only sees your top half. This is technically true and strategically wrong.
Dress fully. Wear a complete professional outfit, including pants, shoes, and everything you’d wear to an in-person interview. This isn’t about the unlikely scenario of standing up on camera (though that happens, and it’s devastating when it does). It’s about psychology.
Wearing a full professional outfit puts you in a professional headspace. Your posture improves, your confidence increases, and your energy shifts. Sitting in professional attire from the waist up and pajama bottoms from the waist down creates a mental split that subtly undermines your sense of authority and seriousness.
What to wear on camera:
- Solid colors work best. Avoid small patterns, thin stripes, and intricate prints, which can “shimmer” or create moiré effects on camera.
- Avoid pure white (it can bloom and overexpose) and pure black (it absorbs light and loses texture). Off-white, navy, charcoal, medium blue, and muted tones photograph well.
- Match the company’s dress culture. Research their team page, LinkedIn photos, and career page. If everyone wears hoodies, a suit jacket looks disconnected. If the team dresses business casual, match that level.
- Wear something you’ve worn before and feel comfortable in. An interview is not the time to debut a new outfit that might fit awkwardly, itch, or distract you.
Prepare Your Notes (Without Reading Them)
One advantage of video interviews: you can have notes available without the interviewer knowing.
Smart note placement:
- Tape a few key bullet points on the wall behind your monitor, just above the camera. Your eyes shift slightly upward to reference them, which looks natural (you’re looking near the camera anyway).
- Open a minimized document on the same screen as the video call, positioned just below the camera. Glancing at it briefly is fine. Reading from it continuously is obvious and deadly.
- Keep a printed sheet on your desk with three sections: key stories and achievements you want to mention, questions you want to ask, and the names and titles of your interviewers.
What not to put in notes: Full scripted answers. If you read prepared responses, your delivery becomes monotone, your eye contact disappears, and the interviewer can tell immediately. Notes should be trigger words and bullet points, just enough to jog your memory, not replace your natural speech.
Part 4: During the Call
The First 30 Seconds
Research on first impressions consistently shows that people form judgments within 7 to 30 seconds of meeting someone. On video, this window is even shorter because the screen creates a frame that focuses attention immediately.
When the call connects:
- Smile genuinely. Not a frozen grin, just a warm, natural smile that says “I’m glad to be here.”
- Greet them by name. “Hi Sarah, it’s great to meet you” is warmer and more personal than “Hello” or “Hi there.”
- Make a brief human connection. “Thank you for taking the time today” or “I’ve been looking forward to this conversation” sets a positive tone in five seconds.
- Confirm the audio and video. “Can you hear me clearly?” is a professional courtesy that also gives you a chance to fix any technical issue before the real conversation begins.
These four steps take 15 seconds and establish warmth, professionalism, and competence before the first real question is asked.
Active Listening on Camera
In person, active listening happens naturally through proximity, micro-nods, and quiet affirmations. On video, you need to be more intentional because the camera can make a silent listener look disengaged or frozen.
How to show you’re listening on camera:
- Nod visibly at key points (not constantly, which looks like a bobblehead).
- React facially to what the interviewer says: a slight eyebrow raise for something interesting, a smile for something positive, a thoughtful expression for a complex point.
- Pause before answering. When the interviewer finishes a question, wait one full second before responding. This prevents interrupting (especially with video lag), shows that you’re thinking rather than reciting, and creates a confident, measured pace.
- Reference what they said. “You mentioned earlier that the team is growing quickly, and that connects to something I experienced at…” This proves you were listening, not just waiting for your turn to speak.
Managing the Mute Button
Know where your mute button is and use it strategically.
Mute when: You need to cough, clear your throat, take a sip of water, or during any unexpected background noise. A quick mute-unmute is invisible if done smoothly. A loud cough directly into the microphone is jarring and lingers in the interviewer’s memory.
Don’t mute when: The interviewer is speaking and you’re listening. Some people mute during the other person’s turn to prevent any ambient noise, but this means your verbal affirmations (“right,” “yes,” “that makes sense”) are silenced, and the interviewer gets no audio feedback that you’re engaged. Stay unmuted during normal conversation and mute only when something disruptive happens on your end.
Handling Technical Difficulties
Technical problems happen to everyone, including the interviewer. How you handle them communicates more about your professionalism than the problem itself.
If your video freezes or audio drops:
- Don’t panic. Don’t apologize excessively. Say: “It looks like I lost connection for a moment, could you repeat the last part?” Calm, direct, solution-oriented.
- If the problem persists, suggest switching to phone audio: “Would it be easier to continue by phone? I can dial in right now.”
- If you get disconnected entirely, rejoin immediately. If you can’t rejoin within 60 seconds, send an email: “I apologize for the disconnection. I’m rejoining now and should be back momentarily.”
If the interviewer has technical problems:
- Be patient and gracious. “No worries at all, take your time.” This is a character test, whether intentional or not.
- Don’t fill the silence with nervous chatter while they fix their issue. Wait calmly.
The universal rule: Technology fails forward. Whoever handles the problem with calm professionalism wins the moment. Whoever spirals into apologies and frustration loses it.
Answering Questions Effectively on Camera
The content of your answers matters enormously, but how you deliver those answers on camera requires specific adjustments.
Speak slightly slower than normal. Video lag, even a fraction of a second, makes fast speech harder to follow. A slightly measured pace sounds confident and thoughtful, and it gives the audio compression time to transmit every word cleanly.
Use shorter sentences. Long, complex sentences are harder to follow without in-person visual cues. Break your thoughts into clear, digestible statements. Pause between ideas. Let each point land before moving to the next.
Structure your answers. The STAR framework (Situation, Task, Action, Result) works well on camera because it gives your answer a clear beginning, middle, and end. Rambling answers are harder to follow on video than in person because the interviewer can’t use body language to redirect you, they just sit there while you keep talking.
Watch for the “over-talking” signal. If the interviewer starts nodding rapidly, looks like they want to jump in, or their expression shifts from engaged to patient, wrap up your answer. A clean “…and that’s what drove the 40% improvement” is better than adding two more minutes of supporting detail that dilutes your main point.
End your answers clearly. In person, you can signal completion through body language, a shift in posture, a change in tone. On camera, these signals are muted. Finish your answer with a clear final statement and a brief pause. If appropriate, add: “Would you like me to go deeper on any part of that?” This signals completion and invites dialogue.
Part 5: Common Mistakes That Cost Candidates the Job
Mistake 1: The Multi-Screen Eye Wander
Having multiple monitors or a second screen open during the interview creates a giveaway: your eyes keep drifting to one side. The interviewer notices immediately and assumes you’re reading notes, checking email, or browsing something unrelated.
The fix: Close everything on secondary monitors. If you use notes, keep them on the same screen as the video call, positioned directly below the camera.
Mistake 2: The Notification Ambush
A Slack ping, an email banner, a text message vibration. Each notification steals your attention for a split second, and each split second is visible on camera.
The fix: Turn on Do Not Disturb on every device. Close Slack, email, and messaging apps. Silence your phone completely (not just vibrate, which is still audible through a desk). Disable browser notifications. This is 30 seconds of preparation that prevents repeated distractions throughout the call.
Mistake 3: The Dead Face
On camera, a neutral resting expression often looks bored, displeased, or checked out. This is especially problematic during the listening portions of the interview, which make up roughly half the total call time.
The fix: Consciously maintain a “soft engaged” expression. Slightly raised eyebrows, a hint of a smile, occasional nods. It feels exaggerated internally, but on camera, it reads as warm and attentive.
Mistake 4: The Background Distraction
A roommate walking through the frame, a child opening the door, a cat jumping on the desk. These moments are humanizing in casual video calls and derailing in professional interviews.
The fix: Lock the door. Communicate your interview time to everyone in the household. Put pets in another room. A sign on the door that says “Interview in progress, please do not enter” prevents 90% of interruptions.
Mistake 5: The Monologue Trap
Without the natural rhythm of in-person conversation (leaning forward, hand gestures that signal “I want to respond,” shifts in eye contact), video interviews are prone to one-sided monologues. Candidates answer for three, four, five minutes without pausing, and the interviewer’s engagement quietly erodes.
The fix: Cap most answers at 90 seconds to two minutes. After making your key point, pause and check in. “Does that answer your question, or would you like me to elaborate on a specific part?” This creates dialogue instead of presentation and shows awareness of the other person’s time.
Mistake 6: Forgetting to Ask Questions
When the interviewer says “Do you have any questions for us?” and you say “No, I think you covered everything,” you’ve just communicated one of three things: you’re not that interested, you didn’t prepare, or you don’t think critically about opportunities.
The fix: Prepare three to five questions in advance. Ask at least two. Focus on questions that demonstrate genuine curiosity about the role, the team, or how success is measured. Strong examples:
- “How does the team handle asynchronous communication when members are in different time zones?”
- “What does a successful first 90 days look like for someone in this role?”
- “What’s the biggest challenge the team is currently working through?”
- “How do you approach giving and receiving feedback in a remote environment?”
Avoid questions that are purely self-serving (“How quickly can I get promoted?”) or that signal you didn’t research the company (“What does your company do?”).
Mistake 7: The Abrupt Goodbye
Ending a video interview is awkward. There’s no handshake, no walk to the elevator, no natural transition. Many candidates handle this by rushing the goodbye, clicking “Leave Meeting” the instant the interviewer says “thanks for your time.”
The fix: Mirror the closing rhythm of an in-person interview. Thank the interviewer by name. Express genuine interest in the next step. Let them end the call first if possible.
“Thank you so much, Sarah. I really enjoyed learning about the team and the direction you’re heading. I’m very interested in this opportunity, and I’d love to continue the conversation. Have a great rest of your day.”
Then wait a beat. Let them respond and close. Then leave the call.
Mistake 8: No Follow-Up
The interview ends and you exhale, close your laptop, and move on with your day. Meanwhile, the interviewer is comparing you against five other candidates, and the one who sends a thoughtful follow-up email within two hours edges ahead.
The fix: Within one to two hours of the interview, send a brief, personalized thank-you email. Reference something specific from the conversation that resonated with you. Restate your interest. Keep it under 150 words.
Example:
Hi Sarah,
Thank you for the conversation today. I especially enjoyed hearing about the team’s plans for the Q3 product launch and how cross-functional collaboration works across time zones.
The more I learned about the role, the more confident I am that my experience building async content workflows and managing distributed editorial teams would translate well here. I’d be excited to contribute to what you’re building.
Looking forward to the next steps. Please don’t hesitate to reach out if any follow-up questions come up.
Best,
[Your Name]
This email takes five minutes to write and separates you from the 70% of candidates who never send one.
The Pre-Interview Checklist (Save This)
Print this or save it on your phone. Run through it 30 minutes before every video interview:
Technical:
- Camera at eye level, framing shows head and shoulders
- Lighting on your face, no backlight from windows
- Audio tested (headset or earbuds preferred)
- Internet stable (speed tested, wired if possible)
- All unnecessary apps and tabs closed
- Phone silenced and out of reach
- Do Not Disturb enabled on all devices
- Backup plan ready (phone number, dial-in, interviewer’s email)
- Glass of water within reach
Environment:
- Background clean and professional
- Door closed and locked
- Household informed of interview time
- Pets secured in another room
Personal:
- Full professional outfit (yes, pants too)
- Notes positioned near the camera, not on a second screen
- Questions for the interviewer prepared (minimum 3)
- Key stories and achievements top of mind
Mindset:
- Arrived at desk 10 minutes early
- Taken three deep breaths
- Smiled at the camera before the call connects
- Reminded yourself: they already liked you enough to schedule this call
The Screen Is Not Your Enemy
Video interviews feel unnatural because they are unnatural. You’re performing a deeply human act, building trust and connection with a stranger, through a medium that strips away most of the tools humans use to do exactly that.
But here’s what works in your favor: most of your competitors feel the same discomfort, and very few of them prepare for it. They show up with bad lighting, cluttered backgrounds, and laptop cameras pointed at their ceilings. They read scripted answers, avoid eye contact with the camera, and forget to smile.
You now know better. You know that camera angle shapes perception, that lighting determines how professional you appear, that looking at the lens creates connection, and that the small details, the follow-up email, the prepared questions, the 15% energy boost, are what separate a good interview from a forgettable one.
The screen isn’t a barrier between you and the job. It’s a stage. Set it correctly, perform with intention, and let the person on the other side see exactly who they’d be hiring.