If you’ve been doing affiliate marketing for more than a few weeks, you’ve probably run into the same problem every affiliate marketer eventually faces.
Your links are a mess.
You have Amazon links scattered across 40 blog posts. A ShareASale link in an article you wrote six months ago that might be pointing to a product that no longer exists. Three different versions of the same affiliate URL because you copied it from your dashboard at different times. And absolutely no way to know which links are actually generating clicks, which pages are driving sales, or which links are completely dead.
Raw affiliate links are ugly, hard to manage, and nearly impossible to update at scale. A typical Amazon affiliate link looks something like this:
That string of characters means nothing to your readers. It looks suspicious in a browser status bar when someone hovers over it. And if Amazon changes the product URL or you switch affiliate programs, you’d need to find and replace that link in every single post where you used it.
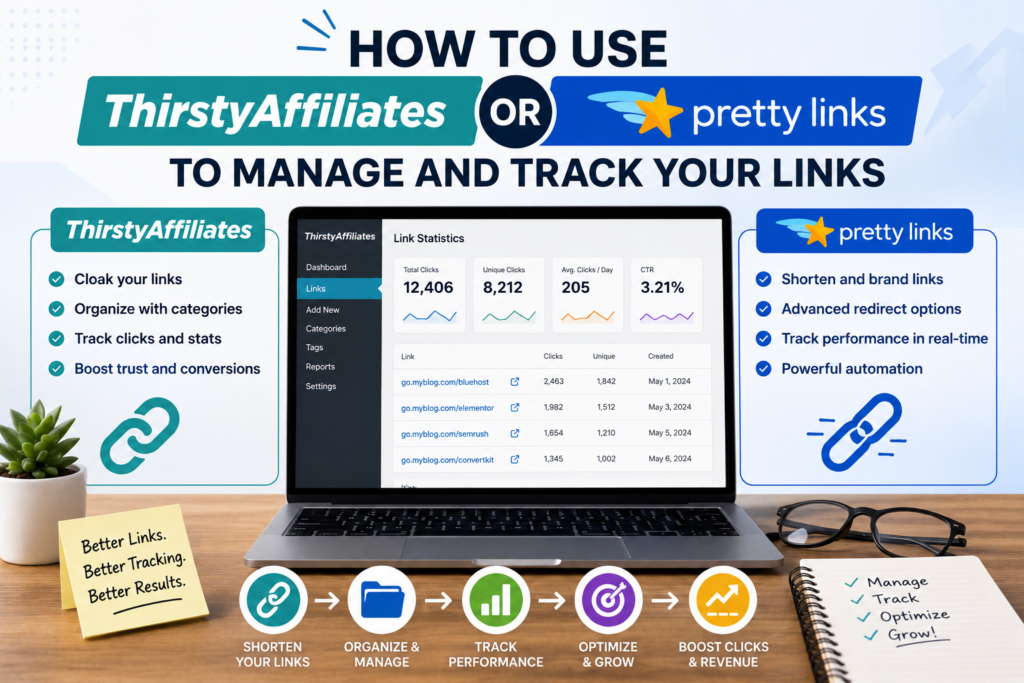
This is the problem that affiliate link management plugins solve. The two most popular options for WordPress users are ThirstyAffiliates and Pretty Links. Both turn messy affiliate URLs into clean, branded links, centralize your link management in one place, and give you tracking data on clicks and performance.
This guide covers how both plugins work, how to set them up, and how to use them to build a link management system that saves you hours of work and gives you data you can actually use.
Why You Need an Affiliate Link Management Plugin
Before getting into the specifics of each plugin, let’s be clear about what problems these tools solve.
Problem 1: Ugly Links Kill Trust
When a reader hovers over a link and sees a long, cryptic URL full of tracking parameters, question marks, and random character strings, their instinct is to hesitate. It looks like spam. It looks like a redirect to somewhere shady. Even if they trust your content, the link itself creates a moment of doubt that reduces clicks.
A managed link transforms that experience:
Before: https://www.amazon.com/dp/B09V3KXJPB?tag=yourtag-20&linkCode=ogi&th=1&psc=1
After: https://yourdomain.com/recommend/standing-desk
The second link is clean, readable, and carries your domain name. It tells the reader exactly what they’re clicking on. It looks professional. And it builds trust instead of eroding it.
Problem 2: Updating Links Is a Nightmare Without Centralized Management
Imagine you’ve recommended a specific blender in 15 different blog posts over the past year. The manufacturer discontinues that model and releases a replacement. Without a link management plugin, you’d need to:
- Remember (or search for) every post that contains that link
- Open each post individually
- Find the link within the content
- Replace it with the new product’s URL
- Save and update each post
With a link management plugin, you change the destination URL once in your plugin dashboard, and every instance of that link across your entire site updates automatically. The branded link (yourdomain.com/recommend/blender) stays the same. Only the destination it points to changes.
This single capability saves affiliate marketers dozens of hours per year and prevents the accumulation of broken or outdated links that frustrate readers and waste potential commissions.
Problem 3: You Can’t Improve What You Can’t Measure
Most affiliate program dashboards tell you how many total clicks and conversions your account generated. But they don’t tell you which specific page on your site drove those clicks. They don’t tell you whether the link in paragraph 3 gets more clicks than the link in your comparison table. They don’t tell you which blog posts are your top revenue generators.
Link management plugins add a tracking layer that gives you per-link click data. You can see exactly how many times each individual link was clicked, which pages generated those clicks, and how click patterns change over time. This data lets you make informed decisions about where to place links, which content to update, and which products deserve more prominent placement.
Problem 4: Program Switches Become Painful
Affiliate marketers switch programs. You might move from Amazon Associates to a direct brand partnership that pays 15% instead of 3%. You might join a new network and want to update your links to the new tracking URLs.
Without a management plugin, switching programs means a tedious find-and-replace operation across your entire site. With a plugin, you update the destination URL in one place and every instance of that link across your site redirects to the new program instantly.
Problem 5: Link Rot Silently Kills Revenue
Over time, affiliate links break. Products get discontinued. URLs change. Affiliate programs restructure their link formats. Each broken link is a missed commission and a poor reader experience. Link management plugins can alert you to broken links, making it easy to find and fix problems before they cost you money.
ThirstyAffiliates: Full Overview and Setup Guide
ThirstyAffiliates is a WordPress plugin built specifically for affiliate marketers. It was designed from the ground up to handle affiliate link management, and its feature set reflects that specialized focus.
What ThirstyAffiliates Does
- Creates clean, branded redirect links for your affiliate URLs
- Organizes links into categories for easy management
- Tracks clicks on every managed link
- Automatically adds affiliate links to content based on keywords (Pro version)
- Supports link health checking to find broken or outdated links (Pro version)
- Adds nofollow, sponsored, and target attributes to your links automatically
- Integrates with Google Analytics for detailed tracking
- Imports links from CSV files for bulk management
- Supports geographic link redirects (sending US visitors to Amazon.com and UK visitors to Amazon.co.uk)
Installing ThirstyAffiliates
Step 1: Log in to your WordPress dashboard.
Step 2: Go to Plugins > Add New.
Step 3: Search for “ThirstyAffiliates.”
Step 4: Click “Install Now” on the ThirstyAffiliates plugin (by Jevin Developer Team).
Step 5: Click “Activate.”
Once activated, you’ll see a new “ThirstyAffiliates” menu item in your WordPress sidebar.
Creating Your First Managed Link
Step 1: Go to ThirstyAffiliates > New Affiliate Link.
Step 2: Enter a descriptive title for the link. This is for your internal reference, not visible to readers. Use something clear like “Amazon – Logitech MX Master 3S Mouse.”
Step 3: In the “Destination URL” field, paste your raw affiliate URL. This is the ugly link from your affiliate program dashboard.
Step 4: The “Slug” field determines what appears in your clean URL. By default, ThirstyAffiliates generates it from your title. You can customize it to something shorter and cleaner, like “mx-master-mouse.”
Your branded link will look like: yourdomain.com/recommends/mx-master-mouse
(The “/recommends/” prefix is the default. You can change this in the plugin settings.)
Step 5: On the right sidebar, assign the link to a category. Create categories that match your content structure: “Computer Accessories,” “Office Equipment,” “Software,” etc.
Step 6: Scroll down to “Link Options” to configure:
- Redirect type: 301 (permanent) or 302 (temporary). For affiliate links, 302 is generally recommended because the destination may change.
- Nofollow: Enable this. Affiliate links should have the
rel="nofollow"attribute for SEO compliance. - Sponsored: Enable the
rel="sponsored"attribute, which Google recommends for paid and affiliate links. - Open in new tab: Personal preference. Many affiliates enable this so readers don’t navigate away from the original content.
Step 7: Click “Save Link.”
Your managed link is now active. Every time someone visits yourdomain.com/recommends/mx-master-mouse, they’ll be redirected to the full Amazon affiliate URL.
Configuring ThirstyAffiliates Settings
Go to ThirstyAffiliates > Settings to customize the plugin’s behavior.
Link Appearance tab:
- Link prefix: The default is “recommends.” You can change this to whatever fits your brand: “go,” “refer,” “visit,” “recommend,” “link,” etc. Choose something short and neutral.
- Link category in URL: You can choose to include or exclude the category in your link URL. Including it creates URLs like
yourdomain.com/recommends/tech/mx-master-mouse. Excluding it keeps URLs shorter.
Link insertion tab:
- Default link options: Set your default nofollow, sponsored, and new-tab preferences so you don’t have to configure each link individually.
- Uncloak links: Some affiliate programs (including Amazon Associates) technically require that users can see the final destination URL. ThirstyAffiliates offers an uncloak option that passes the redirect transparently. Check your specific affiliate program’s terms of service regarding link cloaking.
Important note about Amazon Associates: Amazon’s Operating Agreement has historically had restrictions on link cloaking. While ThirstyAffiliates uses redirect methods that are generally accepted, always verify current Amazon policies. Many affiliates use ThirstyAffiliates with Amazon links without issues, but awareness of the policy is worth maintaining.
Organizing Links With Categories
As your link library grows, organization becomes critical. ThirstyAffiliates lets you create hierarchical categories for your links, similar to WordPress post categories.
Recommended category structure:
Create categories that mirror your content topics and affiliate programs:
- By product type: “Standing Desks,” “Monitors,” “Keyboards,” “Software,” “Books”
- By affiliate program: “Amazon Links,” “ShareASale Links,” “Direct Brand Links”
- By content type: “Resource Page Links,” “Review Post Links,” “Email Links”
A well-organized category system means you can quickly find any link when you need to update it, and you can filter your click data by category to see which product types perform best.
Tracking Clicks in ThirstyAffiliates
The free version of ThirstyAffiliates includes basic click tracking. You can view click counts for each link in your ThirstyAffiliates link list.
For more detailed reporting, the Pro version offers:
- Click-through reports with date ranges
- Geographic click data showing where your clicks originate
- Per-page click tracking showing which content drives the most clicks
- Google Analytics integration for combining affiliate click data with your broader site analytics
Even with the free version, the basic click count per link gives you immediately actionable data. If Link A has 500 clicks and Link B has 12 clicks, you know where to focus your optimization efforts.
ThirstyAffiliates Pro Features Worth Knowing About
The free version handles the basics well. The Pro version adds several features that become valuable as your site grows:
Automatic keyword linking: Define keywords for each affiliate link, and ThirstyAffiliates automatically converts those keywords into affiliate links throughout your content. If you set “MX Master” as a keyword for your Logitech mouse link, every time those words appear in your posts, they’ll become clickable affiliate links. You can set limits on how many times per post a keyword gets linked to avoid over-linking.
Link health checker: Scans your affiliate links periodically to detect broken or redirected URLs. When a product page goes dead or an affiliate program changes its URL structure, you’ll get notified so you can fix the issue before it costs you clicks.
Geolocation redirects: Automatically send visitors to the correct regional Amazon store (or other geo-specific URLs) based on their location. A US visitor clicks your link and goes to Amazon.com. A UK visitor clicks the same link and goes to Amazon.co.uk. This is particularly valuable if you have international traffic.
CSV import and export: Bulk-import links from a spreadsheet, which saves enormous time if you’re migrating from another system or setting up a large number of links at once.
Advanced reports: Detailed click reporting with date filtering, comparison tools, and export capabilities.
Pretty Links: Full Overview and Setup Guide
Pretty Links is another popular WordPress plugin for affiliate link management. While ThirstyAffiliates was built specifically for affiliate marketers, Pretty Links was designed as a general-purpose link shortener and redirect manager that works extremely well for affiliate links.
What Pretty Links Does
- Creates clean, short redirect links on your own domain
- Supports 301, 302, and 307 redirects, as well as JavaScript and meta-refresh redirects
- Tracks clicks on every managed link with detailed statistics
- Organizes links into groups and categories
- Supports link rotation (split testing different destination URLs)
- Offers automatic keyword linking (Pro version)
- Provides detailed click reports with IP, referrer, and browser data
- Integrates with Google Analytics
- Supports QR code generation for links
- Creates links in bulk from CSV files
Installing Pretty Links
Step 1: Log in to your WordPress dashboard.
Step 2: Go to Plugins > Add New.
Step 3: Search for “Pretty Links.”
Step 4: Click “Install Now” on the Pretty Links plugin (by Pretty Links).
Step 5: Click “Activate.”
A new “Pretty Links” menu item appears in your WordPress sidebar.
Creating Your First Pretty Link
Step 1: Go to Pretty Links > Add New.
Step 2: Configure the redirect:
- Redirection type: Choose your redirect method. Options typically include 301 (permanent), 302 (temporary), and 307 (temporary). For affiliate links, 302 or 307 are standard choices.
- Target URL: Paste your raw affiliate URL here. This is the long, ugly link from your affiliate program.
- Pretty Link slug: Enter the slug for your clean URL. For example, “standing-desk” creates the link
yourdomain.com/standing-desk.
Step 3: Optionally, add:
- Title: An internal name for the link (e.g., “Amazon – Jarvis Standing Desk”)
- Group: Assign the link to a group for organizational purposes
- Notes: Internal notes about the link (e.g., “Commission rate: 4%, Cookie: 24hrs”)
- Nofollow: Check this to add
rel="nofollow"to the link - Sponsored: Check this to add
rel="sponsored"to the link
Step 4: Click “Create” or “Update.”
Your Pretty Link is now live. Visitors to yourdomain.com/standing-desk will be redirected to your full affiliate URL.
Pretty Links URL Structure
One key difference from ThirstyAffiliates: Pretty Links doesn’t use a prefix by default. Your links appear directly under your domain:
yourdomain.com/standing-deskyourdomain.com/mx-masteryourdomain.com/best-headphones
You can add a prefix if you prefer the organizational clarity:
yourdomain.com/go/standing-deskyourdomain.com/refer/mx-master
Many affiliates prefer the prefix approach because it keeps affiliate redirects clearly separated from your regular site pages and avoids any chance of a slug conflict with an actual post or page on your site.
To set a default prefix, you can include it in each slug manually, or use Pretty Links’ settings to configure a global prefix.
Tracking and Reports in Pretty Links
Pretty Links’ free version includes solid click tracking. For each link, you can view:
- Total clicks over all time
- Clicks by date with a visual chart
- Unique clicks vs. total clicks (distinguishing repeat visitors from new ones)
The click details page shows individual click records including:
- Timestamp of each click
- Referring URL (which page on your site the visitor clicked from)
- IP address (useful for identifying click patterns, but be mindful of privacy regulations)
- Browser and operating system information
This referrer data is particularly valuable. It tells you exactly which blog posts are generating the most affiliate clicks, which helps you understand which content is performing best and where to focus your optimization efforts.
Pretty Links Pro Features
The Pro version adds capabilities that scale with your site:
Automatic keyword replacement: Like ThirstyAffiliates Pro, this feature automatically turns specified keywords in your content into affiliate links. You define which keywords trigger each link and set limits on how many replacements per page.
Link rotation and split testing: Create multiple destination URLs for a single Pretty Link and split traffic between them. This lets you test whether Product A or Product B generates more sales, or whether Amazon converts better than a direct brand affiliate program for the same product.
Advanced redirect types: Pro adds options for JavaScript-based redirects and conditional redirects based on user location or device type.
Dynamic link replacement: Automatically replace URLs across your entire site based on rules you define. If you switch from one affiliate program to another, you can set up a replacement rule that updates all links at once.
Product display add-on: Create visual product display boxes with images, prices, and call-to-action buttons, all powered by your Pretty Links.
Categories and tags: More granular organizational tools for managing large link libraries.
ThirstyAffiliates vs. Pretty Links: Which Should You Choose?
Both plugins solve the same core problem, but they approach it differently. Here’s an honest comparison.
| Feature | ThirstyAffiliates (Free) | Pretty Links (Free) |
|---|---|---|
| Link cloaking/redirects | Yes | Yes |
| Click tracking | Basic (click counts) | Detailed (clicks, referrers, IPs) |
| Link categories | Yes | Groups |
| Nofollow/sponsored attributes | Yes | Yes |
| URL prefix customization | Yes (default: /recommends/) | Manual (no default prefix) |
| Redirect types | 301, 302, 307 | 301, 302, 307, JS, meta-refresh |
| Amazon compliance features | Uncloak option available | Standard redirects |
| Built for affiliate marketing | Yes (purpose-built) | No (general link management) |
| Link import | Pro only | Pro only |
| Feature | ThirstyAffiliates Pro | Pretty Links Pro |
|---|---|---|
| Auto keyword linking | Yes | Yes |
| Link health checking | Yes | No |
| Geolocation redirects | Yes | Yes |
| Link rotation/split testing | No | Yes |
| Advanced reporting | Yes | Yes |
| CSV import/export | Yes | Yes |
| Google Analytics integration | Yes | Yes |
Choose ThirstyAffiliates If:
- You want a plugin built specifically for affiliate link management
- Amazon Associates is a primary program and you want Amazon-specific compliance features
- Link health checking is a priority (Pro version)
- You prefer a guided, affiliate-focused setup experience
- Geolocation redirects for international Amazon stores matter to your strategy
Choose Pretty Links If:
- You want more detailed click tracking in the free version (referrer data, IP logging)
- You plan to split-test different affiliate programs or products against each other (Pro version)
- You want more flexible redirect type options
- You use managed links for purposes beyond affiliate marketing (tracking outbound links, shortening URLs for social media, etc.)
- You prefer a cleaner, simpler interface
The Honest Answer
For most beginner affiliate marketers, either plugin will serve you well. The differences between them are marginal compared to the massive improvement either one brings over managing raw affiliate links manually.
If you had to choose blindly, here’s a reasonable default:
- Affiliate-only site focused on product reviews and recommendations → ThirstyAffiliates
- Multi-purpose blog where affiliate links are one of several link management needs → Pretty Links
You can always switch later. Both plugins allow you to export your link data, and migrating from one to the other is straightforward if your needs change.
Best Practices for Affiliate Link Management
Regardless of which plugin you choose, these practices will keep your link system organized, effective, and sustainable as your site grows.
Use Consistent, Descriptive Slugs
Your link slugs should be short, readable, and descriptive. A reader should be able to guess what the link points to just by reading the URL.
Good slugs:
/recommend/logitech-mx-master/go/autonomous-standing-desk/refer/convertkit
Bad slugs:
/recommend/link1/go/product-47/refer/aff-12345
Descriptive slugs build trust (readers can see where the link goes before clicking) and make your link library easier to manage as it grows to hundreds of entries.
Create a Naming Convention and Stick to It
When naming your links in the plugin dashboard, use a consistent format that makes searching and sorting easy.
Recommended format: [Program] - [Product Name] - [Variant if applicable]
Examples:
- “Amazon – Logitech MX Master 3S – Black”
- “ShareASale – ConvertKit – Annual Plan”
- “Impact – Canva Pro – Monthly”
- “Direct – Autonomous SmartDesk Pro – Standing Desk”
This convention lets you filter by program name, search by product name, and distinguish between product variants at a glance.
Set Up Categories That Scale
Start with a category structure you can maintain as your site grows. Changing your organizational system after you have 300 links is painful.
A structure that works for most affiliate sites:
Level 1 categories by content area:
- Tech and Electronics
- Home and Kitchen
- Software and Tools
- Books
- Health and Fitness
Level 2 subcategories by product type:
- Tech > Mice and Keyboards
- Tech > Monitors
- Tech > Audio Equipment
- Home > Kitchen Gadgets
- Home > Organization
- Software > Writing Tools
- Software > Design Tools
This two-level structure provides enough granularity to be useful without becoming an unmanageable taxonomy.
Always Use Nofollow and Sponsored Attributes
Google expects affiliate links to carry rel="nofollow" or rel="sponsored" attributes. These tell search engines that the link is commercial in nature and shouldn’t pass PageRank to the destination.
Both ThirstyAffiliates and Pretty Links let you set these attributes as defaults, so every new link you create automatically includes them. Turn this on during initial setup and don’t think about it again.
Audit Your Links Quarterly
Set a calendar reminder every 3 months to review your link library:
- Check for broken links. Click through your top-performing links to make sure they still reach active product pages. If you’re using ThirstyAffiliates Pro, the link health checker automates this.
- Remove outdated links. If a product has been discontinued and you’re no longer recommending it in any content, delete or archive the link.
- Update destination URLs. If you’ve switched affiliate programs or found better commission terms for a product, update the destination URL in your plugin. Every instance of that link across your site will automatically point to the new destination.
- Review click data. Identify your top 10 most-clicked links and your bottom 10. For top performers, consider giving them more prominent placement in your content. For zero-click links, evaluate whether the content they appear in needs improvement or whether the product recommendation isn’t resonating.
Don’t Over-Link Your Content
Having a link management tool makes it easy to stuff every paragraph with affiliate links. Resist this temptation.
Excessive affiliate links in a single post hurt readability, dilute click-through rates (too many options leads to decision paralysis), and can trigger both reader skepticism and search engine quality signals.
A reasonable guideline: 3 to 5 affiliate links per 1,000 words of content. Place them where they naturally support your recommendation, not in every sentence that mentions a product.
If you’re using the automatic keyword linking feature (available in Pro versions of both plugins), set conservative limits: 1 to 2 automatic links per post per keyword, with a maximum of 3 to 5 auto-linked keywords per post.
Track the Metrics That Actually Matter
Click counts are interesting, but they’re not the full picture. The metrics that actually drive revenue optimization are:
Click-through rate (CTR) by page: What percentage of visitors on a given page click an affiliate link? If your standing desk review gets 5,000 monthly visitors but only 50 affiliate clicks, your CTR is 1%, which suggests the link placement, call-to-action, or content persuasiveness needs improvement. Compare CTR across your top pages to identify what’s working and what isn’t.
Clicks per link placement: If you have the same product linked three times in a single post (once in the intro, once in the body, once in the conclusion), track which placement gets the most clicks. This data informs your linking strategy across all future content.
Revenue per click: Combine your link management click data with your affiliate program’s conversion and earnings data. If Link A generates 200 clicks and $40 in commissions (revenue per click: $0.20) while Link B generates 50 clicks and $75 in commissions (revenue per click: $1.50), Link B is dramatically more valuable per click. This information might lead you to give Link B more prominent placement despite its lower click volume.
Click trends over time: A link that generated 100 clicks per month six months ago but now generates 15 suggests either declining traffic to that content, a change in reader interest, or a product that’s falling out of favor. Monitoring trends helps you catch declining performance early.
Setting Up Google Analytics Integration
Both ThirstyAffiliates and Pretty Links can integrate with Google Analytics, giving you richer data about your affiliate link performance within the context of your broader site analytics.
Why Integrate With Google Analytics?
Your link management plugin tells you that Link X got 200 clicks. Google Analytics tells you:
- What the user did before and after clicking the link
- Which traffic source brought the visitor who clicked (organic search, social media, email, direct)
- How long the visitor spent on your page before clicking
- Whether mobile or desktop users click more often
- Which geographic regions generate the most affiliate clicks
This combined data set reveals patterns your link plugin alone can’t show. For example, you might discover that visitors from Pinterest click affiliate links at twice the rate of visitors from Google search, which would inform your traffic acquisition strategy.
Basic Google Analytics Event Tracking Setup
If you’re using Google Analytics 4 (GA4), affiliate link clicks can be tracked as events. Both plugins offer built-in GA integration in their Pro versions that handles the technical setup for you.
For the free versions, you can set up basic tracking by configuring your links to use UTM parameters:
Example UTM-tagged destination URL:https://www.amazon.com/dp/B09V3KXJPB?tag=yourtag-20&utm_source=yourblog&utm_medium=affiliate&utm_campaign=standing-desk-review
These UTM parameters are appended to the destination URL (not your Pretty Link or ThirstyAffiliates slug) and appear in your Google Analytics traffic reports for the destination site. While you can’t track conversions on Amazon through your own GA account, the UTM tags help you organize and identify your link placements within your own analytics data through event tracking and outbound click monitoring.
Advanced Strategies for Link Management
Strategy 1: Create Link Hubs (Resource Pages)
Instead of scattering individual affiliate links across dozens of posts, create a central “Recommended Tools” or “Resources” page on your site. This page lists all your top product recommendations, organized by category, with your managed affiliate links.
Benefits of a resource page:
- Single update point: When you change a recommendation, you update one page rather than hunting through multiple posts.
- SEO value: A well-structured resource page can rank for “[your niche] tools” and “[your niche] recommendations” queries.
- Link consolidation: Blog posts can link to your resource page rather than directly to products, keeping your content cleaner and your link management simpler.
- Reader value: Your audience gets a one-stop reference for all your recommendations.
Use your link management plugin to create a dedicated category for resource page links, making them easy to track and update as a group.
Strategy 2: Use Link Groups for Campaign Tracking
When you run a specific promotion, product launch coverage, or seasonal campaign (Black Friday, back-to-school, holiday gift guides), create a dedicated link group or category for that campaign.
For example, create a “Black Friday 2026” category and build campaign-specific links:
yourdomain.com/bf2026/standing-deskyourdomain.com/bf2026/monitoryourdomain.com/bf2026/keyboard
After the campaign, you can review click data for the entire group to see which products performed best during the promotion. This data informs next year’s campaign strategy.
Strategy 3: A/B Test Product Recommendations
If you use Pretty Links Pro, the link rotation feature lets you split traffic between two different products or two different affiliate programs.
Example: You want to know whether your audience prefers Product A ($150, 8% commission) or Product B ($120, 12% commission). Create a Pretty Link that rotates between both destination URLs. After 500 to 1,000 clicks, compare which product generated more revenue based on clicks, estimated conversion rates, and commission amounts.
This approach removes guesswork from product recommendations and lets you optimize for actual revenue rather than assumptions.
Strategy 4: Segment Links by Funnel Position
Create separate managed links for the same product based on where in your content funnel the link appears:
yourdomain.com/recommend/product-review(for use in detailed review posts)yourdomain.com/recommend/product-comparison(for use in comparison posts)yourdomain.com/recommend/product-sidebar(for use in sidebar widgets)yourdomain.com/recommend/product-email(for use in email newsletters)
All four links point to the same destination URL, but because they’re tracked separately, you can see which content type and which placement drives the most clicks. This segmentation reveals whether your reviews, comparisons, sidebar widgets, or emails are the most effective channel for each product.
Strategy 5: Build a Link Documentation System
For sites with 100+ managed links, create a simple spreadsheet that documents:
- Link slug
- Destination URL
- Affiliate program
- Commission rate
- Cookie window duration
- Product status (active, discontinued, seasonal)
- Date added
- Date last verified
- Notes (e.g., “Higher commission available through direct program, switch by Q3”)
This documentation sits outside your plugin and serves as a strategic planning tool. During quarterly audits, you can reference it to identify optimization opportunities, upcoming program switches, and links that need verification.
Common Mistakes With Link Management Plugins
Installing both plugins simultaneously.
Running ThirstyAffiliates and Pretty Links at the same time creates conflicts and confusion. Pick one and commit to it. If you want to switch later, export your data from the first plugin, deactivate it, and import into the second.
Creating links but never checking them.
A link management plugin is only useful if you maintain it. Links that pointed to active products six months ago might be dead now. Build a review habit into your workflow.
Using overly clever or misleading slugs.
Your link slugs should accurately represent the destination. A slug called /recommend/free-tool that redirects to a paid product page destroys trust immediately. Accuracy in your slugs is a trust signal, not just an organizational choice.
Ignoring redirect type implications.
A 301 redirect tells search engines that the redirect is permanent. A 302 tells them it’s temporary. For affiliate links, 302 is generally the right choice because your destination URL may change. Using 301 for affiliate links can cause search engines to index and cache the destination URL in ways that create problems if you later change the destination.
Not disclosing that links are affiliate links.
A managed link that looks like yourdomain.com/recommend/product might hide the fact that it’s an affiliate link from readers. You still need clear disclosure on every page where affiliate links appear. Your link management plugin makes links cleaner, but it doesn’t remove your legal and ethical obligation to disclose the affiliate relationship.
Setting and forgetting automatic keyword linking.
If you enable automatic keyword linking without reviewing the results, you might end up with affiliate links appearing in inappropriate contexts: in your about page, in informational posts where sales intent doesn’t exist, or in paragraphs where the link feels forced. Review your auto-linked content after setup and adjust your keyword rules to avoid awkward placements.
Getting the Most From Your Link Management Plugin
The plugin itself is just a tool. The value comes from how you use it. Here’s a practical workflow that turns link management from a chore into a competitive advantage.
When you publish new content:
- Identify every product or service you mention
- Check your link library, does a managed link already exist?
- If yes, use the existing managed link
- If no, create a new managed link, assign it to the right category, and add nofollow/sponsored attributes
- Insert the managed link into your content
Weekly (5 minutes):
- Check your click dashboard for any significant changes
- Note which links are getting the most activity this week
Monthly (15 minutes):
- Review your top 10 and bottom 10 links by click volume
- Check if any new products or programs should replace existing links
- Verify that your top-performing links still resolve to active product pages
Quarterly (30 to 60 minutes):
- Full link audit: check all links for broken destinations
- Review affiliate program terms for any commission changes
- Update documentation spreadsheet
- Evaluate whether any program switches would increase your revenue
- Analyze click data trends to inform your content strategy for the next quarter
This workflow adds maybe 2 hours per quarter to your workload, while preventing broken links, missed commission opportunities, and the slow accumulation of link rot that silently kills affiliate revenue over time.
Your affiliate links are the direct connection between your content and your income. Managing them with intention, tracking their performance, and maintaining them over time isn’t optional busywork. It’s the infrastructure that turns good content into consistent revenue.
Pick a plugin. Set it up. Build the habit. Your future self, the one who doesn’t have to manually update 200 links when you switch affiliate programs, will appreciate it.