There’s a particular kind of frustration that hits when you browse successful Etsy shops and see beautifully designed templates, polished product mockups, and professional branding that looks like a design agency built it. The thought process goes something like: “I could never make something that looks like that. I’m not a designer. This isn’t for me.”
That thought is wrong. But it’s understandable, because most Etsy advice assumes you already know how to use Figma, have opinions about font pairings, and can whip up a product mockup before breakfast.
The reality is that thousands of profitable Etsy sellers have zero formal design training. They didn’t go to art school. They can’t draw. They’ve never opened Photoshop. What they did was pick a product category that doesn’t require advanced design skills, learn the minimum viable tools, and build a shop that works because of smart positioning and solid execution, not because of pixel-perfect aesthetics.
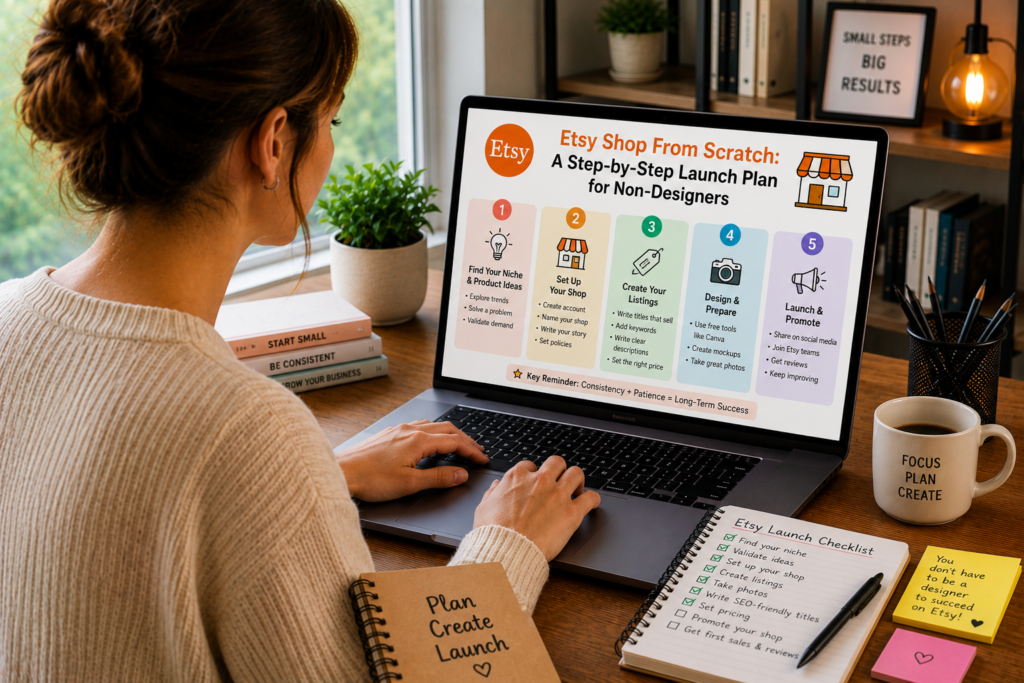
This guide is built specifically for that person. No assumed knowledge. No “just use Illustrator” instructions. Every step assumes you’re starting from zero: zero design background, zero Etsy experience, zero existing audience. By the end, you’ll have a fully operational Etsy shop with products listed, optimized for search, and ready to make sales.
Before You Open Your Shop: The Decisions That Shape Everything
Most Etsy guides rush to the account setup process. That’s like starting a road trip by turning the car on before deciding where you’re going. The decisions you make before opening your shop determine whether it succeeds or sits empty for months.
Decision 1: What are you going to sell?
This is where non-designers get stuck. They see Etsy and think “handmade jewelry” or “custom illustrations” and immediately feel excluded. But Etsy’s product categories extend far beyond visual artistry.
Digital product categories that don’t require design skills:
Spreadsheet templates. If you know Google Sheets or Excel reasonably well, you can create budget trackers, meal planners, inventory managers, project timelines, and financial calculators. The design bar is low. Clean formatting, organized columns, working formulas, and helpful instructions are what buyers value. Nobody expects a spreadsheet to look like a magazine cover.
Notion templates. Notion’s block-based system means you can build functional, attractive workspaces by arranging pre-built components. No design software needed. If you’re organized and can structure information logically, you can create Notion templates that sell.
Printable checklists, planners, and worksheets. A checklist doesn’t need to be beautiful. It needs to be complete, well-organized, and useful. A wedding planning checklist, a home cleaning schedule, a packing list for international travel, a homeschool curriculum planner. These are text-heavy products where the value is in the content, not the visual presentation.
Editable text-based documents. Resume templates, business plan outlines, contract templates, proposal frameworks, email scripts, and social media caption templates. These are Word or Google Docs files that buyers customize with their own information. Your skill is writing and organizing, not designing.
Educational materials. Flashcard sets, study guides, vocabulary lists, lesson plans, and activity sheets. If you have expertise in any academic subject, you can package that knowledge into downloadable materials.
Planning and organizational tools. Moving checklists, renovation planning guides, baby registry checklists, event planning timelines. If you’ve been through an experience and organized it well, that organizational system has value to someone about to go through the same thing.
Canva-based templates (yes, even for non-designers). Canva’s drag-and-drop interface was built for people without design skills. Using Canva’s built-in elements, stock photos, and pre-styled text options, you can create social media templates, presentations, and marketing materials that look professional. You’re assembling components, not creating from scratch.
Decision 2: Who specifically is buying this?
“People who need a budget template” isn’t specific enough. The more precisely you define your buyer, the easier every subsequent decision becomes.
Compare these two positioning statements:
Vague: “A budget spreadsheet for anyone who wants to manage money better.”
Specific: “A monthly budget spreadsheet designed for couples in their 20s and 30s who are combining finances for the first time and want to track joint expenses, individual spending, and shared savings goals in one place.”
The specific version tells you exactly what features to include, what language to use in your listing, what images to create, and which keywords to target. It practically writes your product description for you.
Ask these questions about your buyer:
- What stage of life are they in? (College student, new parent, retiree, newlywed)
- What specific problem are they trying to solve right now?
- What have they already tried that didn’t work?
- What would they search for on Etsy to find this product?
- How much have they spent (or are willing to spend) on solving this problem?
- Where do they hang out online? (This matters for marketing later)
Write your buyer description on a sticky note and keep it visible while you build your shop. Every decision, from product features to listing photos to pricing, should serve that specific person.
Decision 3: What’s your pricing strategy?
Pricing before you build feels backward, but it actually shapes your product decisions. If you decide to price at $7, you’ll build a simpler product. If you price at $27, you’ll need to include more value. Knowing your price point first prevents you from over-building a $7 product or under-building a $27 one.
Research competitive pricing:
- Search Etsy for products similar to what you plan to create.
- Filter by “Best Sellers” or sort by most reviews.
- Note the prices of the top 10-15 results.
- Identify the pricing clusters (most products in a certain range).
Typical price ranges by product type on Etsy:
| Product Type | Common Price Range | Sweet Spot |
|---|---|---|
| Simple printable (single page) | $1.50-$5 | $2.99-$3.99 |
| Printable bundle (5-15 pages) | $5-$15 | $7.99-$9.99 |
| Spreadsheet template | $5-$25 | $9.99-$14.99 |
| Notion template (single) | $5-$19 | $7.99-$12.99 |
| Notion workspace (comprehensive) | $15-$49 | $19.99-$29.99 |
| Canva template pack | $5-$29 | $9.99-$16.99 |
| Resume template | $8-$20 | $9.99-$14.99 |
| Editable document template | $5-$20 | $7.99-$12.99 |
Price your first product in the middle of the competitive range for your category. Not the cheapest (that signals low quality) and not the most expensive (you don’t have reviews and credibility yet to justify a premium). As you accumulate reviews and refine your products, you can raise prices.
Setting Up Your Etsy Shop: The Technical Walkthrough
Step 1: Create your Etsy account
Go to etsy.com and click “Sign in,” then “Register.” You can sign up with an email address, Google account, Facebook account, or Apple ID.
Once you have a buyer account, click “Sell on Etsy” (top right corner on desktop) or find it in the menu on mobile. Etsy walks you through a setup wizard.
Shop preferences you’ll set during setup:
- Shop language: English (or your primary language)
- Shop country: Your country of residence (affects tax reporting and payment processing)
- Shop currency: The currency you want to price in (typically USD for the broadest market)
Step 2: Choose your shop name
Your shop name is your brand on Etsy. It appears on every listing, every receipt, and every customer interaction. Choose carefully, because changing it later is possible but disrupts any brand recognition you’ve built.
Shop name guidelines:
- 4-20 characters, no spaces or special characters
- Must be available (Etsy checks instantly)
- Should be memorable and easy to spell
- Ideally hints at what you sell or who you serve
- Avoid overly generic names (“DigitalShop123”) and overly clever names that nobody can remember or spell
Name strategies for non-designers:
- Niche + Studio/Co/Lab: “BudgetLabCo,” “PlannerStudioHQ,” “NotionNestCo”
- Descriptive approach: “SmartSheetTools,” “ReadyMadePlanners,” “TemplateTrail”
- Personal brand: “SarahPlansCo,” “JakesTemplates” (works well if you plan to build a personal brand around your products)
Don’t agonize over this. A decent name that you start with today beats a perfect name you spend two weeks deliberating. Your products and reviews matter infinitely more than your shop name.
Step 3: Set up your shop sections
Shop sections are categories that organize your products. Buyers can browse by section, and sections help Etsy’s search algorithm understand what your shop is about.
For a new shop, plan 3-5 sections based on what you intend to sell. You can add more later.
Example sections for a spreadsheet and planner shop:
- Budget Templates
- Business Spreadsheets
- Printable Planners
- Bundles and Deals
- Free Resources (a strategic section that can drive traffic and build trust)
Step 4: Complete your shop profile
Shop icon: A simple logo or stylized text of your shop name. Canva has free logo templates you can customize in minutes. A clean, readable icon on a solid background works fine. You don’t need a custom illustration or professional logo at this stage.
Shop banner: The large image at the top of your shop page. Create one in Canva using the “Etsy Shop Cover Photo” template (it’s pre-sized). Include your shop name, a brief tagline (“Budget templates that actually make sense”), and a clean design that matches your product aesthetic.
About section: Write 2-3 paragraphs about who you are, why you create these products, and what buyers can expect. Be genuine and specific. Mention your background if it’s relevant to your products. If you sell budget templates because you personally struggled with money management and built these tools for yourself, say that. Authenticity builds trust.
Shop policies: Set clear policies for:
- Returns and exchanges: For digital products, many sellers have a no-refund policy (since the file can’t be “returned”), but offering refunds for technical issues or product dissatisfaction builds buyer confidence. A common approach: “Due to the digital nature of these products, I do not offer refunds. If you have any issues with your download, please contact me and I’ll make it right.”
- Delivery timeline: Instant download (standard for digital products).
- FAQs: Address common questions before they become support requests. “How do I download my files?” “What software do I need?” “Can I use this for commercial purposes?”
Step 5: Set up payment and billing
Payment account: Etsy Payments is the default (and in most countries, required) payment processor. You’ll enter your bank account information for deposits. Etsy deposits your earnings on a regular schedule (daily, weekly, biweekly, or monthly, depending on your settings and shop history).
Billing: Etsy charges fees from your payment account balance. You’ll need to add a credit card as a backup payment method for fees.
Understanding Etsy’s fee structure:
| Fee Type | Amount | When It’s Charged |
|---|---|---|
| Listing fee | $0.20 per listing | When you publish or renew a listing |
| Transaction fee | 6.5% of sale price (including shipping) | When you make a sale |
| Payment processing fee | 3% + $0.25 (varies by country) | When payment is processed |
| Offsite ads fee | 15% of sale (if sale came from Etsy’s offsite ad) | Only for sales driven by Etsy’s advertising; mandatory for shops earning over $10,000/year |
Effective total fee on a $15 digital product sale:
- Listing fee: $0.20
- Transaction fee: $0.975 (6.5% of $15)
- Payment processing: $0.70 (3% + $0.25)
- Total fees: $1.875 (12.5% of the sale price)
- Your take-home: $13.13
Budget for roughly 12-15% of each sale going to fees. This should be factored into your pricing.
Creating Your First Product (Without Design Software)
The non-designer’s toolkit
You don’t need Photoshop, Illustrator, Figma, or any professional design software. Here are the tools that non-designers actually use to create sellable Etsy products:
Canva (Free and Pro at $13/month): Your primary creation tool for anything visual. Templates for social media, presentations, printables, planners, ebooks, and more. The free version is sufficient to start. Pro adds premium elements, brand kit features, and the ability to resize designs, which becomes valuable as you scale.
Google Sheets (Free): For spreadsheet templates. Create your template, duplicate it into a clean version without your test data, and share via a view-only link that buyers duplicate to their own Google Drive.
Notion (Free): For Notion templates. Build your workspace, then share it as a template that buyers can duplicate. Notion’s free plan is sufficient for creating and selling templates.
Google Docs or Microsoft Word (Free or included with most computers): For text-based templates like resumes, contracts, proposals, and planning documents.
A phone with a decent camera (you already have this): For lifestyle mockup photos if needed, though most digital product listings use digital mockups created in Canva.
That’s the entire toolkit. Total cost: $0-$13/month.
Creating a spreadsheet template (step-by-step example)
Let’s walk through creating a complete product: a monthly budget spreadsheet for Google Sheets.
Step 1: Plan the structure.
Before opening Google Sheets, outline what the template needs:
- Income tracking section (multiple income sources)
- Fixed expense categories (rent, utilities, insurance, subscriptions)
- Variable expense categories (groceries, dining out, entertainment, transportation)
- Savings and debt payment tracking
- Monthly summary with total income, total expenses, and remaining balance
- Visual dashboard with basic charts
- Instructions tab explaining how to use everything
Step 2: Build the template in Google Sheets.
Create a new Google Sheet. Name it clearly: “Monthly Budget Template.”
Tab 1: Instructions
Write clear, numbered setup steps. Include screenshots if helpful (you can insert images into Google Sheets). Cover:
- How to make a copy of the template
- How to customize categories
- Which cells to edit and which to leave alone
- How the automatic calculations work
Tab 2: Monthly Budget
Build your budget layout:
- Row 1-3: Title and month selector
- Section 1: Income (rows for salary, side hustle, other income, with a total formula)
- Section 2: Fixed expenses (rows for each category, with a total formula)
- Section 3: Variable expenses (same structure)
- Section 4: Savings and debt payments
- Summary row: Total income minus all expenses equals remaining balance
- Use conditional formatting to color-code the remaining balance (green if positive, red if negative)
Tab 3: Dashboard
Create 2-3 simple charts:
- Pie chart showing expense breakdown by category
- Bar chart comparing income vs. expenses
- A summary box with key numbers (total income, total spent, savings rate percentage)
Google Sheets has built-in chart tools. Select your data, click Insert > Chart, choose a chart type, and customize colors and labels. No design skills required.
Step 3: Polish the presentation.
This is where non-designers can gain a surprising amount of ground with minimal effort:
- Apply a consistent color scheme. Pick 2-3 colors and use them throughout. Google Sheets has color presets, or use a hex code from Coolors.co. Apply colors to headers, section dividers, and chart elements.
- Use cell borders and background colors to create visual structure. Alternating row colors, bold section headers, and thin borders between sections make a spreadsheet look organized and professional.
- Freeze the header row so it stays visible as users scroll.
- Protect formula cells. Right-click cells with formulas > Protect range. This prevents buyers from accidentally breaking calculations.
- Add data validation. For cells where users should select from a list (expense categories, months), use Data > Data validation to create dropdown menus. This looks polished and prevents input errors.
- Clean up the formatting. Currency formatting on money cells, percentage formatting on rate cells, consistent font sizes, and aligned text. These small details are the difference between “homemade” and “professional.”
Step 4: Test with real data.
Enter a realistic month of data into every field. Does the budget balance correctly? Do the charts update? Does the conditional formatting trigger properly? Fix any issues.
Then clear the test data and save a clean version. This clean version is what buyers will receive.
Step 5: Prepare the delivery file.
For Google Sheets templates, you have two delivery options:
Option A: Shareable link. Set the template to “Anyone with the link can view.” Include the link in the Etsy digital download file (as a PDF with the link, or a text file). Buyers click the link and make their own copy via File > Make a copy. This is the most common delivery method for Google Sheets products on Etsy.
Option B: Downloadable .xlsx file. Export the Google Sheet as an Excel file. Buyers download the file and open it in Excel or upload it to their own Google Drive. This works for buyers who prefer Excel, but some formatting may shift between platforms.
Many sellers offer both options. Include a PDF instruction sheet explaining both methods.
Creating a printable planner (step-by-step example)
Step 1: Choose a specific planner type.
“Planner” is too broad. Pick one:
- Weekly meal planner with grocery list
- 30-day habit tracker
- Home renovation project planner
- Wedding planning timeline and checklist
- Monthly budget printable with envelope categories
For this example: a weekly meal planner with integrated grocery list.
Step 2: Plan the layout.
Sketch the layout on paper first (or in a notes app):
- Top section: Week of (date range)
- Grid with 7 days: Breakfast, Lunch, Dinner, Snacks for each day
- Bottom section or second page: Grocery list organized by store section (Produce, Dairy, Meat, Pantry, Frozen, Household)
- Notes section for recipes to try or prep instructions
Step 3: Build it in Canva.
Open Canva. Search for “Planner” in the template gallery. Find a clean, minimal template that’s close to what you want. Or start with a blank US Letter (8.5″ × 11″) canvas.
Building the layout:
- Use Canva’s grid and table elements to create the meal grid
- Add text boxes for headers, day labels, and section titles
- Use lines or rectangles to create the grocery list sections
- Keep the design clean: 1-2 fonts maximum, consistent spacing, enough white space for people to write comfortably
- Use subtle colors for section headers and leave the writing areas white
Design tips for non-designers using Canva:
- Stick to Canva’s pre-built elements. Lines, shapes, frames, and grids are already professionally designed. You’re arranging them, not creating them.
- Use Canva’s font combinations. Click on a text element and Canva suggests font pairings that work together. Use these instead of experimenting randomly.
- Leave generous margins. Printables need at least 0.5″ margins on all sides to account for home printer limitations. Content that runs too close to the edge gets cut off during printing.
- Design in black and white first, then add color. A printable that works in grayscale will look good printed on any printer. Color should be an accent, not a requirement.
- Create two versions: full-color and ink-saver (grayscale). Buyers appreciate the option, and it’s a selling point in your listing.
Step 4: Export as PDF.
In Canva, click Share > Download > PDF Print (for highest quality). This creates a high-resolution PDF that prints cleanly at full size.
Step 5: Test print.
Print the PDF on your own printer. Check:
- Are margins adequate? Nothing cut off?
- Is the text readable at the printed size?
- Are writing areas large enough for actual handwriting?
- Does the ink-saver version look acceptable?
Fix any issues and re-export.
Creating Product Listing Images That Sell (Without Design Skills)
Your listing images are your storefront window. On Etsy, buyers scroll through a visual feed and click on the image that catches their eye. If your images look amateurish, buyers won’t click, no matter how good your product is.
The good news: Canva has free mockup templates specifically designed for digital product listings. You don’t need Photoshop. You don’t need stock photography skills. You need Canva and 30-60 minutes per product.
Image 1: The hero shot
This is the thumbnail that appears in Etsy search results. It needs to communicate what the product is within 1-2 seconds at a small size.
How to create it in Canva:
- Search Canva for “Etsy listing mockup” or “digital product mockup”
- Choose a template that shows a laptop, tablet, or phone screen
- Replace the screen image with a screenshot of your actual product
- Add a clear text overlay: the product name and one key benefit
- Use a clean background (solid color, subtle gradient, or minimal desk scene)
What makes a strong hero image:
- Product is clearly visible and readable, even at thumbnail size
- Text is large enough to read on a mobile screen
- Color palette is clean and cohesive
- The image tells you exactly what you’re looking at in under 2 seconds
What kills a hero image:
- Too much text (more than 6-8 words)
- Cluttered background
- Product screenshot that’s too small to read
- Low contrast between text and background
- Generic stock photo with no actual product shown
Image 2-4: Feature highlights
Show specific sections or features of your product with brief text callouts.
For a spreadsheet template:
- Image 2: Close-up of the dashboard with a callout: “Automated charts update as you enter data”
- Image 3: Close-up of the expense tracking section: “Pre-built categories you can customize”
- Image 4: Close-up of the summary section: “See your remaining balance instantly”
For a printable planner:
- Image 2: Full-page view with callout: “Designed for US Letter and A4 printing”
- Image 3: Close-up of the meal grid: “Space for every meal, every day”
- Image 4: Close-up of the grocery list: “Organized by store section to save you time”
Create these in Canva using screenshot + text overlay + clean background. The template mockup designs on Canva make this straightforward even without design experience.
Image 5-6: What’s included and social proof
Image 5: What’s included.
Create a visual checklist or grid showing everything the buyer receives:
- “1 Monthly Budget Spreadsheet (Google Sheets)”
- “1 Annual Overview Dashboard”
- “Instruction Guide (PDF)”
- “Ink-Saver Version Included”
- “Lifetime Updates”
Image 6: Testimonials (once you have them).
Screenshot a positive review or customer message. Display it on a clean background with a subtle design frame. If you don’t have reviews yet, skip this image or replace it with a “How It Works” image showing the 3-step process (Purchase > Download > Customize).
Image 7-10: Additional angles and use cases
Use remaining image slots for:
- The product viewed on different devices (laptop, tablet, phone)
- Before and after: the disorganized version of the problem vs. your organized solution
- A video (Etsy supports video in listings): screen recording of you using the template, with text overlays explaining features. This dramatically increases conversion rates.
Listing video
Etsy allows you to add one video (5-15 seconds) to each listing. This short video auto-plays as buyers scroll through your images.
For non-designers, the easiest approach:
- Screen-record yourself clicking through the template (use the built-in screen recorder on Mac or Windows, or a free tool like OBS)
- Speed up the recording to 2x or 3x speed
- Add text overlays in Canva’s video editor or a free tool like CapCut
- Keep it under 15 seconds
- No audio needed (Etsy listing videos autoplay on mute)
Listings with video consistently outperform listings without video. Even a simple, no-frills walkthrough adds credibility and helps buyers visualize using the product.
Writing Listings That Rank and Convert
Title optimization
Your Etsy title has 140 characters. Use every single one. Front-load the most important keywords (the words buyers actually search for) and add descriptive details.
Formula: [Primary keyword] + [What it is] + [Who it’s for] + [Key feature/benefit] + [Format]
Examples:
“Monthly Budget Spreadsheet | Google Sheets Budget Template for Couples | Expense Tracker with Dashboard | Instant Download”
“Weekly Meal Planner Printable | Meal Prep Planner with Grocery List | Family Dinner Planning | US Letter A4 PDF”
“Notion Finance Tracker | Budget and Expense Template for Freelancers | Income Tracking Dashboard | Digital Planner”
Each title reads naturally while packing in multiple searchable keyword phrases.
Tags
Etsy gives you 13 tags per listing. Each tag can be a multi-word phrase (up to 20 characters). Use all 13. Tags should be phrases that buyers search for, not single words.
Tag strategy:
- 4-5 tags for your primary keywords and close variations
- 3-4 tags for your niche and target audience
- 2-3 tags for product features and benefits
- 1-2 tags for seasonal or trending terms
Example tags for a budget spreadsheet:
- budget spreadsheet
- monthly budget
- google sheets budget
- expense tracker
- budget template
- budget for couples
- finance spreadsheet
- money tracker
- budget planner
- household budget
- savings tracker
- financial planner
- budget dashboard
Research tags using:
- Etsy’s search bar (type a phrase and see auto-complete suggestions, these are real searches)
- eRank (free Etsy SEO tool that shows search volume and competition for keywords)
- Competitor analysis (look at the tags used by top-selling similar products using the eRank or Alura browser extension)
Description
Your description needs to accomplish three things: convince the buyer to purchase, answer their questions before they ask them, and include keywords that help Etsy’s search algorithm find your listing.
Description structure:
Opening paragraph (the hook):
Speak directly to the buyer’s pain point. Make them feel understood.
“Tired of ending every month wondering where your money went? This budget spreadsheet gives you a clear, automatic picture of your income, expenses, and savings, without any complicated formulas to figure out. Just enter your numbers. The template does the rest.”
What’s included (bulleted list):
Spell out exactly what they receive when they purchase.
“When you purchase, you’ll receive:
- Monthly Budget Spreadsheet (Google Sheets)
- Annual Overview Dashboard with automated charts
- Expense Category Setup Guide (PDF)
- Ink-friendly printable version
- Step-by-step video tutorial link
- Free lifetime updates”
How it works (numbered steps):
Reduce anxiety about the purchase process and product usability.
“Getting started takes about 5 minutes:
- Purchase and download the PDF instruction file
- Click the Google Sheets link inside the PDF
- Make your own copy (File > Make a copy)
- Customize your income sources and expense categories
- Start entering your numbers. The dashboard updates automatically.”
Key features (bulleted, benefit-focused):
Highlight what makes your product worth buying.
“What makes this template different:
- Automatic calculations, no formulas to set up yourself
- Visual dashboard with pie charts and spending breakdowns
- Pre-built categories you can customize or add to
- Works on desktop, tablet, and mobile
- Designed for people who aren’t spreadsheet experts”
Who it’s for:
Reinforce that this product was made for them.
“This template is perfect for:
- Couples combining finances for the first time
- Anyone who wants to stop guessing where their money goes
- People who’ve tried budgeting apps and found them too complicated
- Anyone switching from pen-and-paper budgeting to a digital system”
FAQ section:
Address common objections and questions.
“FREQUENTLY ASKED QUESTIONS
Q: Do I need to pay for Google Sheets?
A: No. Google Sheets is completely free. You just need a Google account.
Q: Can I use this in Excel?
A: The template is optimized for Google Sheets, but you can download it as an Excel file. Some formatting may appear slightly different.
Q: Can I customize the categories?
A: Absolutely. The instruction guide shows you exactly how to add, remove, or rename any category.
Q: Will I receive updates?
A: Yes. If I update the template, you’ll receive a message with the new version at no extra cost.”
Closing line with keywords:
Naturally incorporate additional keywords.
“Start taking control of your finances today with this easy-to-use monthly budget spreadsheet template. No design skills needed, no complicated formulas, just a clear, simple way to manage your money.”
Launching Your Shop: The First 30 Days
Week 1: Pre-launch preparation
Days 1-2: Final product and listing preparation.
- Finish your first 3 products (launching with at least 3 listings performs better than launching with 1)
- Create all listing images (5-7 per product minimum)
- Write all listing descriptions
- Prepare all downloadable files, test every link and download
- Proofread everything twice
Days 3-4: Shop setup completion.
- Upload shop icon and banner
- Write your About section
- Set shop policies
- Configure payment and billing
- Create shop sections
Days 5-7: Publish listings and verify.
- Publish all 3 listings
- Test the purchase process yourself (Etsy lets you view your listings as a buyer)
- Download your own digital files to verify they work
- Check all images display correctly on desktop and mobile
- Verify that pricing, tags, and categories are set properly
Week 2: Initial marketing push
Your shop is live, but Etsy’s algorithm doesn’t know you exist yet. New shops get a brief boost in search visibility (Etsy gives new sellers a slight algorithmic push), so maximize this window.
Set up your marketing channels:
Pinterest account. Create a Pinterest business account. Set up boards related to your niche (e.g., “Budget Tips,” “Financial Planning,” “Google Sheets Templates”). Create 5-10 pins per product, each with a different design or angle. Schedule them to post 3-5 per day using Tailwind or Pinterest’s native scheduler.
Social media presence. Pick one platform where your target buyer spends time. TikTok works well for demonstrating digital products. Instagram works well for aesthetic products like planners and Canva templates. Create a content plan:
- 3-5 posts per week
- Mix of product demonstrations, behind-the-scenes creation, tips related to your niche, and direct product promotion
- Bio link pointing to your Etsy shop
Tell your personal network. This feels awkward, but your first sales often come from people you know. Post on your personal social media that you’ve opened an Etsy shop. Send a direct message to friends who might find your products useful. You’re not begging for charity. You’re letting people who care about you know that you’re building something.
Week 3: Optimize based on early data
Check your Etsy stats daily. Etsy provides data on:
- Views: How many people saw your listing in search results
- Visits: How many people clicked through to your listing
- Favorites: How many people saved your listing
- Orders: How many people purchased
What the data tells you:
- Low views: Your SEO needs work. Your tags and title don’t match what buyers are searching for. Research and revise your keywords.
- Views but low visits (low click-through rate): Your hero image isn’t compelling enough. Redesign your thumbnail. Test a different color scheme, text overlay, or product angle.
- Visits but no favorites or orders (low conversion rate): Your listing isn’t convincing buyers. Improve your description, add more images, adjust pricing, or strengthen your value proposition.
- Favorites but no orders: Buyers are interested but hesitant. Price might be too high, or they’re waiting for a sale. Consider a limited-time launch discount to convert fence-sitters.
Week 4: Expand and iterate
Create product 4 and 5. More listings mean more chances to appear in search results. Aim to add 1-2 new products per week during your first month.
Create a bundle. Take your 3-5 individual products and offer them as a discounted bundle. Bundles increase your average order value and give buyers a reason to spend more. If your individual products are $9.99 each, a bundle of all 5 for $29.99 (40% discount) is compelling.
Start building an email list. Create a simple free product (a one-page version of one of your paid templates, a tip sheet, a checklist) and offer it in exchange for email addresses. Use a free email service like MailerLite or ConvertKit’s free plan. Put the opt-in link in your Etsy shop About section, your social media bio, and your Pinterest pin descriptions.
Respond to every message and review promptly. Customer service builds reputation. A quick, helpful response to a question can turn a hesitant browser into a buyer. A thoughtful reply to a review (positive or negative) shows future buyers that you’re present and responsive.
Etsy SEO: How to Get Found Without Paying for Ads
Etsy’s search algorithm determines which products appear when buyers search. Understanding how it works, and how to optimize for it, is the single most impactful thing you can do for your shop’s growth.
How Etsy search works
When a buyer searches for “budget spreadsheet google sheets,” Etsy’s algorithm evaluates every listing with matching keywords and ranks them based on:
Query matching: How well do your title, tags, categories, and attributes match the search query? Etsy looks for exact and partial phrase matches. A tag of “budget spreadsheet” matches the query better than separate tags of “budget” and “spreadsheet.”
Listing quality score: This is Etsy’s measure of how well your listing converts. Listings that generate clicks, favorites, and purchases relative to their impressions get a higher quality score and rank higher over time. This creates a virtuous cycle: good listings rank better, which gets them more views, which generates more sales, which improves their ranking further.
Recency: New and recently renewed listings get a slight boost. This is why some sellers renew listings manually (at a cost of $0.20 per renewal) to get a temporary search bump.
Shop quality score: Your shop’s overall performance (customer reviews, response time, order fulfillment, policy compliance) affects all of your listings’ rankings. A shop with 50 five-star reviews ranks better than a shop with 5 reviews, all else being equal.
Relevancy and buyer behavior: Etsy personalizes results based on the buyer’s browsing history, location, and past purchases. You can’t optimize for this directly, but it means different buyers may see your listing at different positions.
SEO best practices for non-designers
Use long-tail keywords. “Budget” is too broad and too competitive. “Monthly budget spreadsheet for couples Google Sheets” is specific, matches real search queries, and has less competition. Fill your titles and tags with specific phrases, not single words.
Match your tags to your title. If your title includes “budget spreadsheet for couples,” include that exact phrase (or close variations) in your tags. Consistency between title and tags signals strong relevance to Etsy’s algorithm.
Use all 13 tags. Leaving tags empty is leaving search visibility on the table. Even if you have to stretch to find 13 relevant phrases, fill every slot.
Update listings that aren’t performing. If a listing has been live for 30 days with very few views, your keywords aren’t working. Change your tags. Adjust your title. Try different keyword phrases. Every change triggers a minor reassessment by Etsy’s algorithm.
Don’t repeat exact phrases across tags. Each tag should be a distinct phrase. Having “budget template” and “budget spreadsheet template” is fine because they’re different phrases buyers search for. Having “budget template” and “budgeting template” wastes a tag on a near-duplicate.
Leverage categories and attributes. When you create a listing, Etsy asks you to select a category and fill in attributes (like color, occasion, or style). Fill in everything available. These function as additional keyword signals to the algorithm.
Getting Your First Reviews
Reviews are the currency of trust on Etsy. A product with 50 five-star reviews sells dramatically better than an identical product with zero reviews. The cold start problem, having no reviews when you launch, is real, but it’s solvable.
Strategies for earning early reviews
Deliver an exceptional experience. This sounds obvious, but it starts before the purchase. Clean listing, fast download, clear instructions, a product that works exactly as described. When the entire experience is smooth, buyers are naturally inclined to leave positive feedback.
Include a thank-you note in your download. Add a page to your PDF delivery file (or a text note in your download package) that says something like:
“Thank you for your purchase! I’m a small, independent creator, and your support means a lot. If you love this template, I’d be incredibly grateful for a quick review on Etsy. It helps other people find products like this. And if anything isn’t working the way you expected, please message me first. I’m happy to help.”
This is not pushy. It’s a genuine ask that reminds buyers that a real person made this product. Many buyers simply forget to leave reviews. A polite reminder converts a significant percentage of them.
Follow up through Etsy’s messaging. A few days after purchase, send a brief message:
“Hi [Name], thanks for purchasing [Product Name]! I wanted to check in and make sure everything is working well for you. If you have any questions about setting it up, I’m happy to help. Enjoy!”
This serves two purposes: it provides customer support proactively, and it brings the buyer back to Etsy (where they might leave a review). Don’t mention reviews in the follow-up message. Just provide value. The review often follows naturally.
Price one product as a low-cost “gateway.” A $2.99 printable checklist with low purchase friction can accumulate reviews faster than a $24.99 comprehensive template. Those reviews build your shop’s credibility, which helps sell your higher-priced products. Think of the low-cost product as a review generation tool, not a profit center.
Offer a limited launch discount. Pricing your products 20-30% below your long-term target for the first 2-4 weeks attracts early buyers who might not have purchased at full price. Lower prices reduce purchase anxiety and increase volume, which means more potential reviews.
Handling negative reviews
Negative reviews happen. Even excellent products get them, because some buyers misunderstand what they’re purchasing, have technical issues, or have expectations that don’t match the product.
Respond professionally and publicly. Your response is visible to all future buyers. A calm, helpful response to a negative review actually builds trust. It shows that you take feedback seriously and stand behind your products.
Template for responding to negative reviews:
“Thank you for your feedback. I’m sorry this didn’t meet your expectations. [Address the specific complaint: ‘I understand the layout wasn’t what you were looking for’ or ‘I see you had trouble with the download.’]. I’d love to make this right. Please message me directly and I’ll [offer a specific solution: help you customize it, send an alternative version, issue a refund]. I appreciate you giving my product a try.”
What NOT to do: Don’t argue. Don’t blame the buyer. Don’t get defensive. Don’t offer excuses. A defensive response to a negative review damages your reputation more than the negative review itself.
Scaling Beyond the First 10 Sales
The first 10 sales are the hardest because you’re building trust from scratch, testing your marketing channels, and learning the platform. After that, growth accelerates if you follow a consistent process.
The product ladder strategy
Create products at multiple price points that serve the same buyer at different levels of commitment.
Free: A one-page budget checklist (used as an email list builder or social media freebie)
Low-cost ($2.99-$4.99): A simple monthly budget printable
Mid-range ($9.99-$14.99): A comprehensive budget spreadsheet with dashboard
Premium ($24.99-$34.99): A complete financial planning bundle (budget spreadsheet + debt payoff tracker + savings goal tracker + annual review template + instruction videos)
Buyers who discover you through the free product may purchase the low-cost item. Happy low-cost buyers upgrade to mid-range. Satisfied mid-range buyers invest in the premium bundle. Each rung of the ladder builds trust and increases customer lifetime value.
Seasonal and trending opportunities
Etsy’s search traffic spikes around seasonal events, and preparing products in advance captures that demand.
January: New year planners, goal-setting templates, budget templates (New Year’s resolution traffic), fitness and habit trackers
February-March: Wedding planning templates (wedding season preparation), Valentine’s Day printables, tax preparation organizers
May-June: Graduation party printables, teacher appreciation gifts, summer planning templates, travel checklists
August-September: Back-to-school supplies, teacher planners, college student organization templates
October-November: Holiday gift planners, Thanksgiving meal planners, Black Friday/Cyber Monday (your own sale on existing products)
December: Holiday printables, year-in-review templates, gift tags and wrapping labels
List seasonal products 6-8 weeks before the event. Etsy’s algorithm needs time to index and rank new listings, and buyers start searching earlier than you might expect.
Expanding your product line based on data
After 30-60 days of sales, your Etsy stats tell you what buyers want. Look at:
Your best-selling product. Create variations of it. If your monthly budget spreadsheet sells well, create a weekly version, an annual version, a debt-focused version, and a version specifically for small business owners. Your proven seller becomes a product family.
Search terms that lead to your shop. Etsy shows you which searches brought buyers to your listings. If buyers find your budget spreadsheet by searching “expense tracker for small business,” create a product specifically optimized for that keyword.
Questions you receive from buyers. If multiple buyers ask “Do you have a version for [specific use case]?”, that’s a direct product request from your market. Build it.
Products that get favorited but not purchased. High favorites with low purchases usually indicate a pricing or value proposition problem. Test a lower price, add a bonus item, or improve the listing images.
Etsy ads: When and whether to use them
Etsy offers an internal advertising system where you pay to boost your listings in search results. You set a daily budget, and Etsy charges you per click.
When to use Etsy ads:
- After you’ve optimized your listings organically (ads amplify what’s already working, they can’t fix a bad listing)
- On your best-converting products (don’t advertise a listing with a low conversion rate; you’ll pay for clicks that don’t turn into sales)
- During seasonal peaks when search volume is high
- When testing a new product that you want to get initial data on quickly
When NOT to use Etsy ads:
- As a substitute for good SEO (fix your tags and titles first)
- On low-priced items where the ad cost per sale eats your margin
- With a large daily budget before you’ve proven the return is positive
Starting budget: $1-$3/day. Monitor your return on ad spend (ROAS) daily. If you’re spending $2/day and generating $8 in sales, your ROAS is 4x, which is healthy. If you’re spending $2/day and generating $3 in sales, your margins are likely too thin to justify the ads. Adjust or pause.
Cross-promotion and bundles
Cross-promote within your listings. At the bottom of each product description, mention 2-3 related products from your shop:
“You might like these too:
- [Link to related product 1]
- [Link to related product 2]
- Save 30% with my [Bundle Name]”
This turns a single-product visit into a multi-product browsing session and increases average order value.
Create bundles that make the math obvious. If you sell three templates at $12.99 each ($38.97 total), offer a bundle of all three for $24.99. The buyer saves $14 and you earn more per transaction than a single product sale. Bundles are often the highest-revenue listings in a digital product shop.
Managing Your Etsy Shop Long-Term
Time investment expectations
A common question from new sellers: “How many hours per week does an Etsy shop take?”
During launch (first 1-2 months): 10-20 hours per week. Product creation, listing optimization, marketing setup, and learning the platform take significant front-loaded time.
Maintenance phase (months 3-6): 5-10 hours per week. Creating 1-2 new products per month, posting marketing content, responding to customer messages, and monitoring analytics.
Established phase (month 6+): 3-7 hours per week if you’re maintaining existing products. More if you’re actively creating new products or expanding marketing channels.
The “passive” component grows over time. Products you created months ago continue selling through Etsy search and your established marketing channels without daily attention.
Tracking your numbers
Monthly metrics to monitor:
| Metric | What It Tells You | Healthy Benchmark |
|---|---|---|
| Views | How visible your listings are in search | Growing month over month |
| Visit-to-view ratio | How compelling your thumbnails are | 3-10% (varies by niche) |
| Conversion rate | How well your listings convince visitors to buy | 1-5% for digital products |
| Average order value | How much each buyer spends | Higher than your lowest-priced product |
| Revenue per listing | Which products pull their weight | Growing, or stable after initial ramp |
| Review rate | What percentage of buyers leave reviews | 10-25% is typical |
| Return customer rate | Whether buyers come back | 10%+ is strong |
Track these monthly in a simple spreadsheet. Trends matter more than individual data points. A conversion rate that’s been declining for three months is a signal to investigate. A single bad week isn’t.
Dealing with copycats and competition
As your products succeed, competitors will create similar (or identical) products. This is inevitable on Etsy.
What you can do:
- Keep innovating. Competitors can copy your current products, but they can’t copy your next one. Stay ahead by continuously improving and expanding your catalog.
- Build a brand. A recognizable shop with consistent design, a clear voice, and a loyal following is harder to replicate than a single product. Invest in your brand identity over time.
- Protect your IP. If someone copies your product verbatim (identical images, identical description, or your actual files), report them to Etsy for intellectual property infringement. Etsy takes these reports seriously.
- Focus on reviews. A product with 200 reviews will outsell a copycat with 0 reviews, even if the copycat’s product is slightly better. Your head start in reviews is a meaningful competitive advantage.
What you shouldn’t do: Obsess over competitors. Monitor them occasionally for ideas and market trends, but spending hours analyzing every new competing listing is time you could spend creating your next product. Your energy is better invested in your own shop than in worrying about others.
The Realistic Revenue Timeline for a Non-Designer Etsy Shop
Expectations matter. Here’s what a realistic revenue trajectory looks like for a non-designer creating digital products on Etsy with consistent effort.
Month 1: 0-5 sales. Revenue: $0-$50. You’re learning the platform, publishing first listings, starting marketing. This month is about setup, not revenue.
Month 2-3: 5-20 sales. Revenue: $30-$200. SEO is beginning to index your listings. Pinterest pins are starting to circulate. You’re getting initial feedback and making adjustments.
Month 4-6: 15-50 sales/month. Revenue: $100-$500/month. Your catalog has grown to 8-15 products. Some listings are gaining traction in search. You have a handful of reviews building credibility.
Month 7-12: 40-150 sales/month. Revenue: $300-$2,000/month. Your best-selling products are established. Your marketing channels are producing consistent traffic. Reviews are compounding. You understand your niche and your buyer deeply.
Month 12-24: 100-400+ sales/month. Revenue: $800-$5,000+/month. You have a mature catalog (20-40 products), strong SEO presence, an email list driving repeat purchases, and a brand that buyers recognize and trust.
These ranges assume consistent effort: creating new products regularly, marketing actively, responding to customers, and optimizing based on data. The sellers who reach the higher end of these ranges treat their Etsy shop as a real business, not a casual hobby.
Your Launch Checklist
Print this out. Check off each item. Launch your shop this week.
Pre-launch:
- [ ] Decided on product type and specific niche
- [ ] Defined target buyer in one specific sentence
- [ ] Researched competitors and pricing on Etsy
- [ ] Created 3 products
- [ ] Tested every product file (downloads work, formulas calculate, printables print)
Shop setup:
- [ ] Created Etsy account and seller profile
- [ ] Chosen shop name
- [ ] Uploaded shop icon and banner (created in Canva)
- [ ] Written About section
- [ ] Set shop policies
- [ ] Created shop sections
- [ ] Configured payment and billing
Listings:
- [ ] Created 5-7 listing images per product (using Canva mockup templates)
- [ ] Written keyword-optimized titles (using full 140 characters)
- [ ] Filled in all 13 tags per listing
- [ ] Written complete product descriptions (hook, features, what’s included, FAQ)
- [ ] Selected correct categories and filled in all attributes
- [ ] Set pricing
- [ ] Uploaded digital files
- [ ] Published all listings
- [ ] Tested the buyer experience (viewed listings, verified downloads)
Marketing launch:
- [ ] Set up Pinterest business account
- [ ] Created 5-10 pins per product
- [ ] Scheduled first week of pin publishing
- [ ] Chosen one additional marketing channel (TikTok, Instagram, blog)
- [ ] Created first 3-5 pieces of content for that channel
- [ ] Shared shop link with personal network
- [ ] Set up email list with free lead magnet (optional but recommended)
Ongoing (weekly):
- [ ] Check Etsy stats and adjust listings based on data
- [ ] Respond to all customer messages within 24 hours
- [ ] Publish 3-5 pins per day
- [ ] Post 3-5 social media pieces per week
- [ ] Work on next product (target 1-2 new products per month)
You don’t need to be a designer to build a successful Etsy shop. You need a specific product that solves a specific problem for a specific person, listing images clear enough to earn a click, and the consistency to keep creating, marketing, and improving for longer than most people are willing to.
The tools are free. The platform is ready. The buyers are searching right now for products that a non-designer can create. The only missing piece is your first listing.
Go publish it.